Homework 4: Using React
Assigned: 10/5/2021; Due 10/21/2021 at 3:05pm ET
Overview
In this assignment, you will be redoing most of homework 1 in React, which we hope you find to be a lot easier than it was to use pure html/CSS/JavaScript, and adding a shopping cart page, also using React. The objective of this assignment is to learn React and JSX (React's extension to JavaScript for generating html), how to use React for handling state, like the selected shirt and the selected color (for the details page), and the number of items to be purchased (for the shopping cart), etc. You will also be learning and using the ReactRouter package, which helps with having a multi-page web application.
Although we are now using a variety of libraries as part of React, we only want you to use the ones that come with Create-React-App and ReactRouter. You may also use Bootstrap or React's version of Bootstrap (called ReactStrap in this case) which makes it easy to make your implementation responsive and provides patterns like buttons and cards which you had to do by scratch for homework 1.
Note that there are React libraries available already for almost everything, including a number that provide a shopping cart, but you are not allowed to use those -- you must stick to the 3 allowed React packages. If you have another package you think should be allowed, then ask on Piazza.
As with the previous homeworks, you should try to mimic the look and behavior of the examples we provide as closely as possible.
Resources
Michael Liu created an example of a React and ReactRouter app showing Star Wars characters which has a home page, list of characters page, and a details page, so it can be a good model for how you can create something very similar to Homework 1. Here are the links:
- Code page: https://github.com/lxieyang/ssui-simple-react-app. You are allowed to download this and use it to help do this assignment.
- Netlify live site: https://ssui-star-wars.netlify.app/
This article explains everything about deploying a React app to Netlify from GitHub (with React Router in play): https://dev.to/easybuoy/deploying-react-app-from-github-to-netlify-3a9j.
You will download the SSUI-hw4.zip file which will contain the following starter files:
- SSUI-hw4.zip - contains all the starter files and images. Download this file to get started.
- src/ - the beginnings of your src/ folder, that will contain most of the JavaScript and css files. In it, we provide:
- assets/ - a folder containing pictures you might find useful, including all the hw1 pictures and cart.png - a picture of a shopping cart to use as the logo in the upper right.
- shared/
- shirts.js - the shirts.js file has been moved into this subfolder, to make clear that it is used across multiple .js files. It also has the imports and exports set up correctly. Note that it uses a relative path to find the pictures. If you have your folders set up differently, you may need to edit the paths in this file.
In addition, we have supplied the following for your reference, also in the zip file:
- HW4-example.mp4 - a movie showing how the homework should look and behave. You can also see it by clicking on it here.
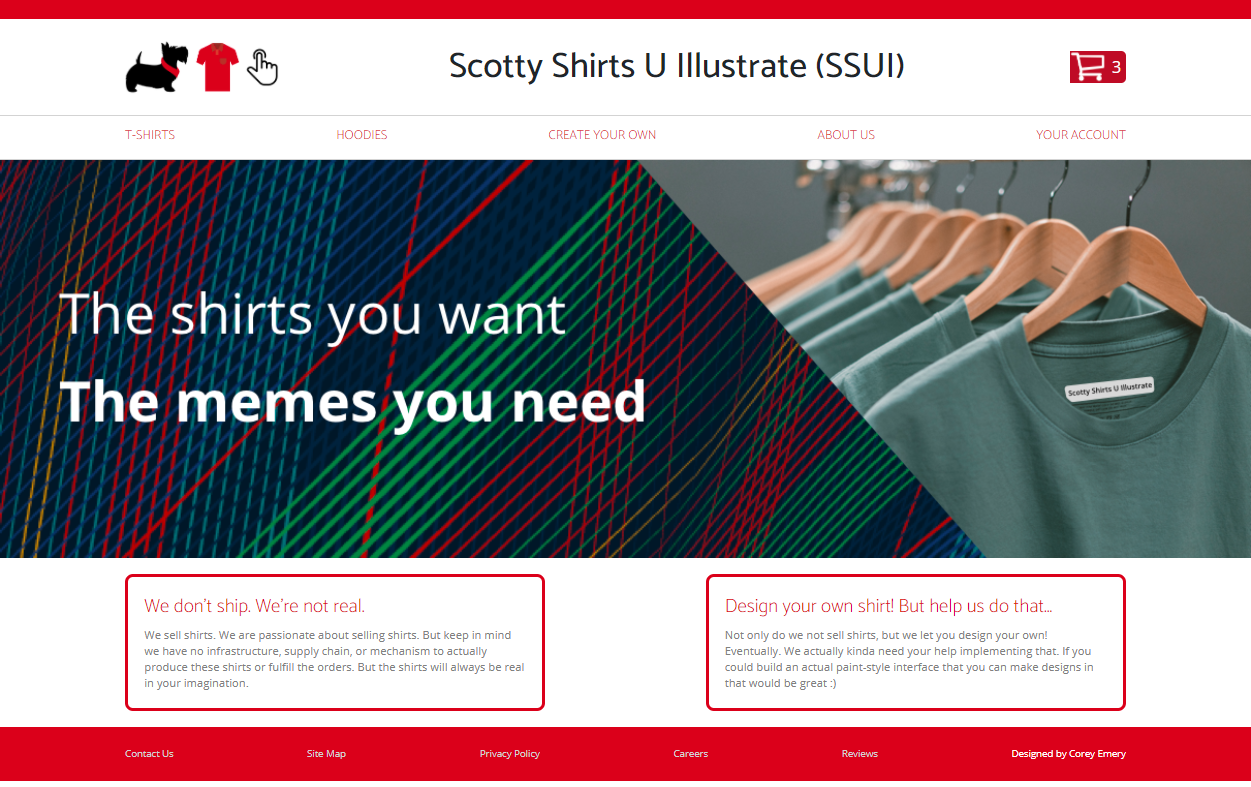
- HW4-index.png - a picture of what the first page should look like. This looks the same as the home page for homework 1, except with the added cart icon in the upper right, but you will have reimplemented this page in React.
- HW4-products.png - a picture of what the products page might look like. Again, looks the same as products for homework 1, adding the cart icon, but reimplemented in React. (Note that we are not doing the "Quick View" part, even if you implemented that for extra credit in homework 1, so the Quick View button should not appear.)
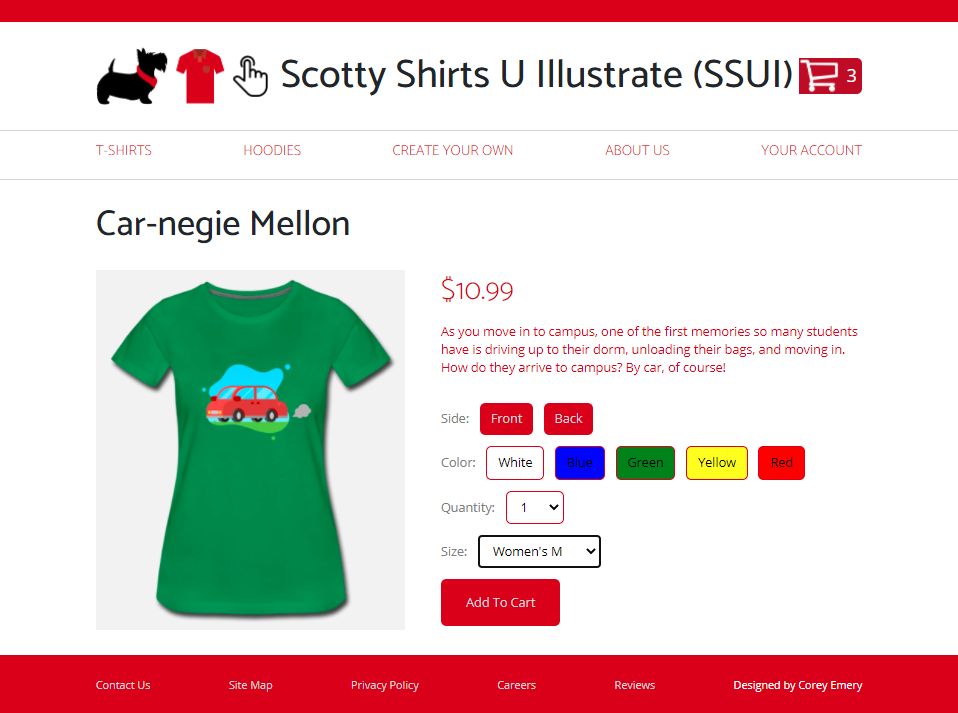
- HW4-details.png - a picture of what the detail page might look like. This is more different than homework's 1 details, with the added size popup, quantity popup, and "add to cart" button (in addition to the cart icon in the header).
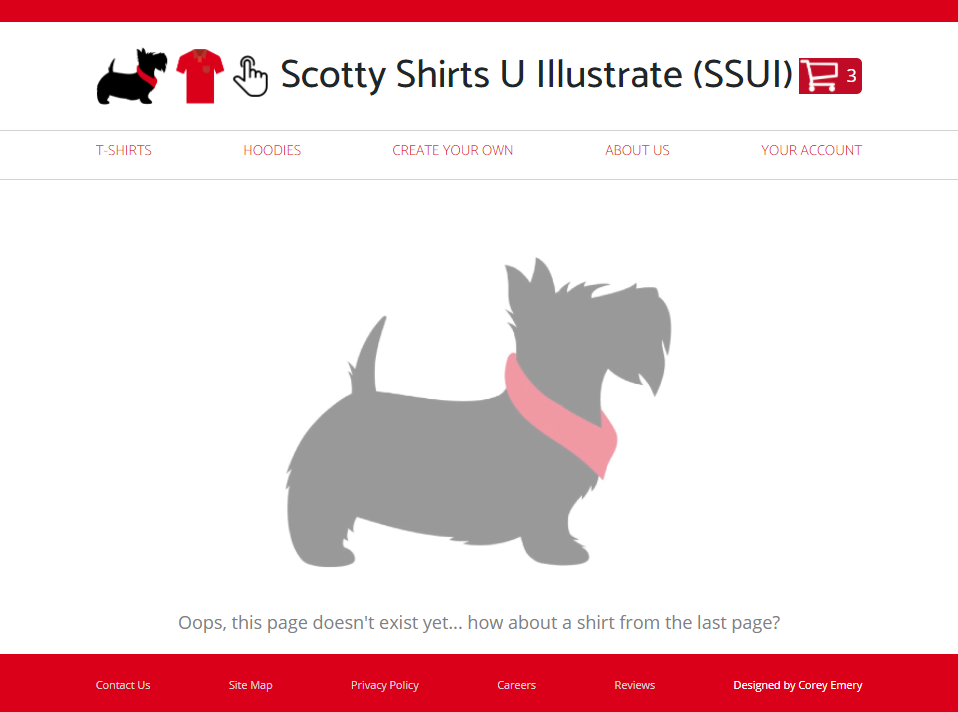
- HW4-not_implemented.png - similar to HW1's but with the header and footer.
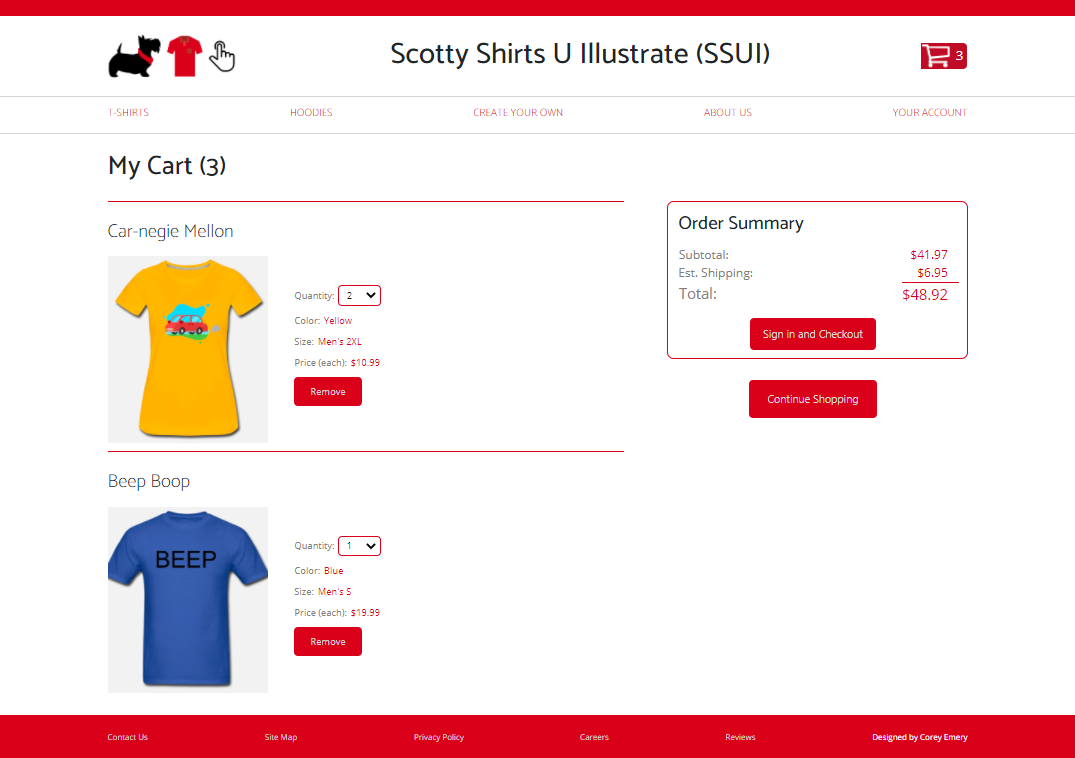
- HW4-shoppingcart.png - the new shopping cart page.
Detailed Requirements
We have supplied screen shots and a movie to define the required behaviors. As with homework 1 and 3, you don't have to be "pixel perfect", but you should have the all operations pretty much looking and behaving in the same way as this specification. If something is unclear about how it should work, or you want to deviate from the defined behavior, you might want to first ask on Piazza. If your homework 1 did not match our specification, you should make your homework 4 match our specification (and not match your incorrect homework 1).
- Since this homework replaces HW1's implementation, please move your original code for homework 1 into a new HW1/ folder and put your homework 4 at the top level, so it will be executed by your Netlify link, etc.
- You do not need to change anything about the homework 3 editor for homework 4. (We will be updating that code in homework 5.) You can have the new homework 4 "CREATE YOUR OWN" button link to the your existing homework 3 code, or if that is a problem, it is fine to just leave the CREATE YOUR OWN button linking to the NOT IMPLEMENTED page as in homework 1, and have no connections to the homework 3 editor in homework 4.
- Shopping cart icon: the shopping cart icon at the top of each page should always show the current number of items in the shopping cart. Clicking on this icon on any page jumps directly to the new Shopping Cart page.
- The header and footer menus should operate the same way they have been (that is, they have the same kind of hover feedback, the logo in the top left goes to the index (home) page, T-SHIRTS goes to the products page, CREATE YOUR OWN goes to the HW3 editor or the NOT IMPLEMENTED page, and all the other items go to the NOT IMPLEMENTED page). You should be able to make header and footer components in React and reuse them on every page.
- The not implemented page for this homework can use the same headers and footers as the other pages (unlike for homework 1). This makes it easier to use the structure from the example Star Wars pages everywhere.
- The products page is similar to homework 1 without the Quick View buttons. Don't forget it needs to work if there are more or fewer shirts.
- The details page has been updated to actually let users pretend to buy the selected item. Additional items are:
- A Size: popup (you can use an HTML select element that has an option for each size choice). The first item in the menu should be the word "Size:", which should be selected by default, but your code should make sure the user selects an actual size (and doesn't leave it with "Size:" selected) before adding that item to the cart (you should gray out the "Add to Cart" button in this case). The options you should have are the same for all shirts, and should be:
Size:
Women’s XS
Women’s S
Women’s M
Women’s L
Women’s XL
Women’s 2XL
Men’s XS
Men’s S
Men’s M
Men’s L
Men’s XL
Men’s 2XL
- Quantity: this should be the label for a select element that has an option for the numbers from 1 to 20, with the default selection being 1. The user should not need to operate this control to buy one shirt (since the default is 1).
- Add to Cart: This should be a button that when clicked, adds the currently selected shirt (shirt type, size, color and quantity) to the cart, and then transitions to the Cart page. Newly added items should be at the TOP of the cart list.
- The "Add to Cart" button should be grayed out and disabled (not clickable) if a size isn't selected or if there is no price in the shirts.js file (indicating the shirt is out-of-stock).
- The "Front" and "Back" and color buttons operate the same as in homework 1, and change the picture.
- The header and footer items (and the Cart icon at the top) operate the same as on other pages.
- If the user clicks on any of the header and footer items or buttons that leave this page, and then comes back to the details page, the system does not need to remember any selections, and can just start over with the default options. For example, if the user is on the details page for "Car-negie Mellon" with Blue "Women's XS" selected, and hits the "Shirst" button in the header (to go to the "Products" page, and then uses the browser's back button to get to the details page again, it is fine to reset this page to be White with "Size" selected. Is it also OK to retain the user's selections (Blue and Women's XS).
- A Size: popup (you can use an HTML select element that has an option for each size choice). The first item in the menu should be the word "Size:", which should be selected by default, but your code should make sure the user selects an actual size (and doesn't leave it with "Size:" selected) before adding that item to the cart (you should gray out the "Add to Cart" button in this case). The options you should have are the same for all shirts, and should be:
- The Shopping Cart Page: The new shopping cart page should look like the example picture. The goal is to provide the usual shopping cart features, using React to keep track of the state.
- The Cart page has the usual Scotty Shirts header and footer.
- If there are no items in the cart, it should show a large label that says "Your Cart is Empty".
- As users add items to the shopping cart from a details page, the shopping cart must keep track of what was ordered, including the type, quantity, color and size of each shirt. The items should be listed in reverse chronological order of when they were added (most recently added shirt at the top).
- If the user goes to the details page, and orders another shirt, that should make a new entry (new row) in the shopping cart, as shown in the picture. This is true even if the user orders the same shirt with the same color and size.
- The only thing that can be changed about entries in the shopping cart is the quantity (which also goes from 1 to 20) or the user can remove the shirt entry (row) from the cart with the "Remove" button.
- The picture of the shirt shown in the cart entry should be in the selected color, but it should always be the front of the shirt, even if the user was showing the back when "Add to Cart" was clicked. If the user clicks on the picture of the shirt in the shopping cart, that should go to the details page showing that shirt. It is fine for the details page to use the usual default values in this case (same as coming from the products page) even if the cart entry has a different color.
- The cart icon at the top in the header, and the number on the first row of the cart page ("My cart (3)") should both show the number of shirts in the cart, which will be the sum of all the quantities. (Note - it is NOT necessarily the number of rows in the shopping cart, since some rows may be for more than one shirt).
- Changing the quantity of any item using the Quantity popup must immediately update both counts of the number of items in the cart, and the prices in the "Order Summary" panel.
- The "Order Summary" panel on the right on the cart page shows:
- The "Subtotal:" of the prices of all the shirts in the cart. This should be dynamically calculated by your code and kept up-to-date, for example if a user changes the quantity or deletes an item from the cart.
- The "Est. Shipping:" which can be a fixed number (like $6.95) since we are not creating the shipping page.
- The "Total:" of the above numbers.
- The "Sign in and Check Out" button should go to the "Not Implemented" page.
- The "Continue Shopping" button should go to the T-Shirts (products) page.
- The items in the shopping cart must be retained as the user moves around the Scotty Shirts website. It is not necessary to retain the cart if the user leaves Scotty Shirts all together, or if the user exits the browser, etc. (Although it is also OK -- but not extra credit -- if the cart is retained across exiting and re-entering the Scotty Shirts site.)
- Your implementation should do something reasonable if the user goes to the Scotty Shirts site multiple times on multiple different tabs -- either combining the carts or keeping them separate is fine, but it should be consistent and not produce any errors.
- Like for homework 1, your website should do something reasonable if one of the pictures in the shirts.js file is missing - use the default picture, for example.
Extra Credit
- Add the ability to Edit items in the shopping cart, instead of just Removing them. For example, provide a popup in which the user can change the color, size, etc. of the desired shirt. Note it does not work to reuse the Details page since that needs to provide the ability to add new items to the shopping cart. Since you are designing the UI behavior as well as implementing it, the quality of your UI design will count for this one. [Up to +5 extra credit, out of 100]
- Add other features normally available in an e-commerce website. [up to +5 for each feature, depending on complexity and quality; max +15].
Turn In
Please have a README file with your code, which can be in plain text, Microsoft Word, or pdf format, which should contain:
- Your site's URL on Netlify, and the link to your Github Repo (these will probably be the same as for previous homeworks, but please put them in your README anyway).
- Any extra credit work you did, and what is the user interface to make it happen.
- What your UI design is for any parts of the specification above that are open, like what happens when the user closes the Scotty Shirts tab and re-opens it, or displays Scotty Shirts one 2 tabs at the same time, etc.
- Important: A discussion about how the React implementation (homework 4) differs from the homework 1 implementation which used just html/css/JavaScript. Which was easier and why? Which was easier to figure out how to do, and why? Which required more code for the same pages?
- Anything else of interest in your design or implementation.
Please upload this README file to Canvas by 3:05pm ET on 10/21/2021.


