Homework 1: Html, CSS, and JavaScript
Assigned: 8/31/2021; Due 9/9/2021 at 3:05pm ET
Overview
In this first assignment, you will create a tiny part of a web site. The key focus is on using html and CSS, and on dynamically building a web page using JavaScript based on a data structure. The content of the page is derived from a database, which here is just a variable in memory, but which in homework 6 will be replaced by getting the data from a real remote database, as if it was a real product list. You are not allowed to use any JavaScript packages (that is, you cannot use React, Bootstrap, jQuery, Vue, or any other library) - everything should be built "from scratch" using regular JavaScript that you write. To give you an idea of the scope of this homework, In the TA's example version, this assignment requires writing about 240 lines of JavaScript in main.js, 330 lines of CSS in styles.css, and about 225 lines of html across 4 html files.
We are calling the web site "Scotty Shirts U Illustrate (SSUI)", and we have supplied a design for you to emulate. Therefore, this assignment does not involve designing the look of the web page, you just need to implement the design we give you. Imagine you are the software engineer at a company tasked with carrying out the design provided by the UX department. You should use appropriate, well designed, html, CSS, and JavaScript so the site renders correctly on the Chrome browser on a regular desktop computer, and the code is easy to understand and maintain.
Resources
The web site will have 4 html pages, 1 JavaScript file, 1 style file, and one database file (which is actually also a JavaScript file). You will write all of these files except the database file. We will supply you with starter code for these files, and also with a collection of images (pictures) that you can use on the pages. You will download the SSUI-hw1.zip file which will contain the following starter files:
- SSUI-hw1.zip - contains all the starter files and images. Download this file to get started.
- index.html - the main, home page, which has links to the other pages and a few other messages and pictures.
- products.html - the products list page. The main content on the page will be generated by JavaScript code that you write based on the database. There will be general menus on the header and footer of the products page, like to go back to the home page, and each product will link to a details page.
- details.html - a page that shows the details of a selected product. The main content will be generated from the same database.
- not_implemented.html - a static "not implemented yet" page, to be used for all the pages of the web site we are not implementing. Having links to this page makes the other pages look more realistic.
- style.css - a file where you will put all the CSS for the website.
- main.js - put all your JavaScript into this file.
- shirts.js - a database of shirts to display on the products page. When we grade your website, we will use a different list with the same format, so you should make sure that your program works with database files with different values for the fields, different number of products (more or fewer shirts, more or fewer colors for each shirt), and with products that have various fields with missing data (like missing price, missing picture, etc.). You should make multiple versions of this file as your tests, and turn them in.
- shirt_images/ - a folder of the images for the shirts that are mentioned in the database.
- site_images/ - some other images you might use for the other pages, like the logo.png, the banner on the home page (home.png) and the scotty.png you can use for the not_implemented.html page.
In addition, we have supplied the following for your reference, in the examples folder of the zip file:
- HW1-example.mp4 - a movie (3:44 min) showing how the homework should look and behave.
- HW1-index.png - a picture of what the first page might look like.
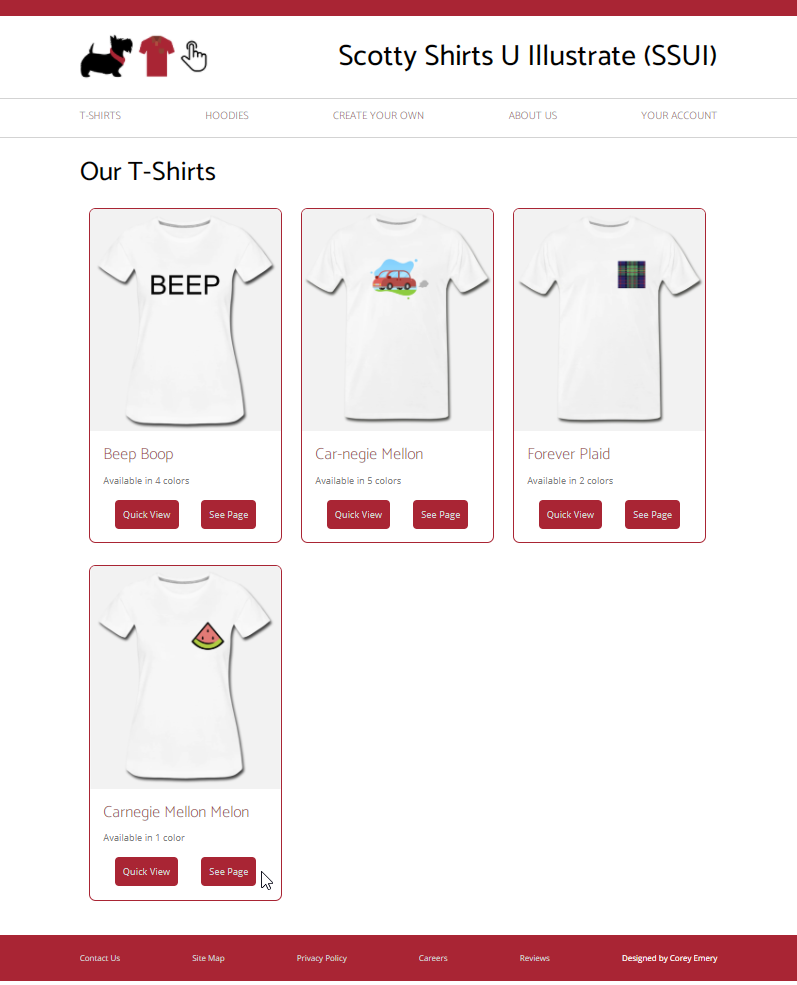
- HW1-products.png - a picture of what the products page might look like.
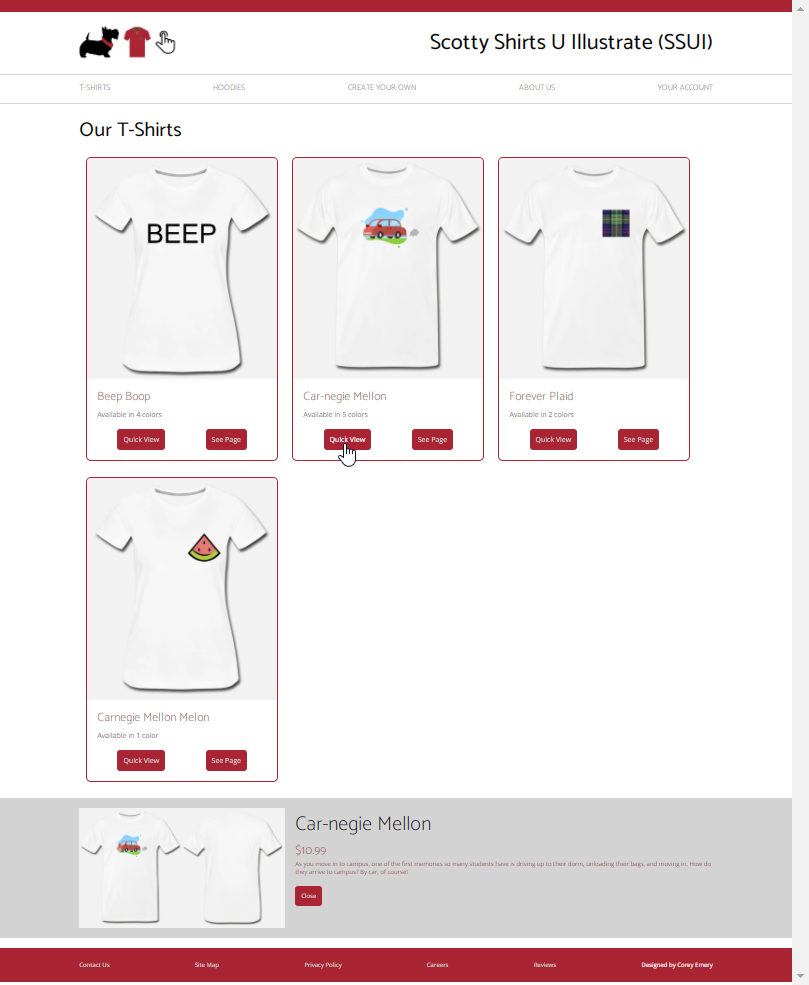
- HW1-products-quickview.png - a picture of the optional (extra credit) Quick View at the bottom of the products page, for the second shirt.
- HW1-details.png - a picture of what the detail page might look like. Note the cursor is hovering over the "Blue" button and its text color has changed to white from the defailt which is black.
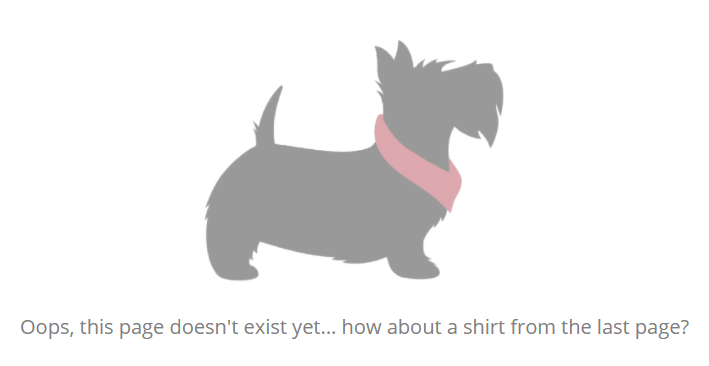
- HW1-not_implemented.png - a picture of the example page for all the links which are not yet implemented.
Detailed Requirements
We expect your design to look generally like the example screen shots and movie, but you do not need to be pixel-perfect. For example, it is not necessary to try to match the exact fonts, sizes, colors or spacing -- just make your site look basically the same as the examples. Spending extra time on the design of the look will not count for extra credit.
The styling should be generally defined by the CSS file, and not in the html file. Specifically, there should be no styling information in the html file, and the dynamicly generated content should also reference classes in the CSS file, when useful. (Hint: but the colored buttons on the details page will need to be generated by your code based on the colors from the shirts.js file).
All of the JavaScript should be collected into the main.js file for all of the web pages.
As should be apparent from the movie and screen shots, here are the required behaviors:
- Every page should contain a header containing the logo, the company name: Scotty Shirts U Illustrate (SSUI), and a top navigation menu containing T-SHIRTS, HOODIES, CREATE YOUR OWN, ABOUT US, and YOUR ACCOUNT. The logo should link to the index (home) page, T_SHIRTS should link to the products page, and all of the other links should go to the not_implemented page. These should all be defined in the html of each page (with the styling in the CSS file). (By the way, you will be creating the page for "CREATE YOUR OWN" in homeworks 3 and 5).
- Similarly, every page should have a footer containing Contact Us, Site Map, Privacy Policy, Careers, Reviews, and an optional "Designed by <yourname>". All of these should link to the not_implemented page (except the "Designed...").
- All clickable elements should indicate they are clickable with a hover behavior, as shown in the video. For example, the top menu items in the example display a red bottom border, and all the other buttons change the text color on hover.
- index (main) page: The center of the index page should contain the home.png image and two text boxes with amusing content.
- products page: Besides the header and footer information, the rest of the content of this page should be generated from the data in the shirts.js file. You should iterate through that list, and create an entry for each item. The entry on the products page should list at least the main picture, the name, how many colors it is available in, and a button to see the details. Clicking on that button or on the picture should take the user to the details page. (The "Quick View" button is optional extra credit - see below.) Note that the layout of the entries should work for any number of shirts, from 1 up to say 20 shirts and any reasonable laptop window width. (Hint: make different versions of the shirts.js file that have different numbers of entries, and make sure your products page still works.) However, it is not necessary for this page (or any other) page to be "responsive" (like changing the size or content of the entries based on the window width) - that is extra credit.
- details page: Similarly to products, besides the header and footer information, the rest of
the content of this page should be generated from the data in the shirts.js file. You should display all the
options available for the selected shirt as clickable elements, and switch the picture shown based on the
user's selections. Each shirt may have a selection of colors, and a front and back for each color, so the front-back
choice and the color choice should be independent. The other information in the data for the shirt should also
be displayed, such as the name, description and the price. As in the products page, your code should be robust
to missing data.
- Hint: you need to transfer the information about which product was selected from the code on the products.html to the details.html page, so the details page knows which item in the data to display. Each html page defines its own JavaScript address space, so you can't just use a global variable. The standard options are to use the localStorage JavaScript feature (setItem in the code on the products page, and getItem on the details page), as explained in lecture. Alternatively, you can pass the parameter in the URL that invokes the details page.
- not-implemented page should alert the user that the page isn't implemented yet. It does not need to have any header, footer or links. The user can get off this page using the browser's back button.
Extra Credit
- As shown in the example, you can add a "Quick View" link to each shirt on the products page, that shows some of the information avaialble on the details page. This can be shown at the bottom as in the example, or as a popup. The user should be able to close the Quick View (the "Close" button in the example; if you use a popup, it should also have an "X" to close it), and it should also link to the details page (clicking on the picture in the example Quick View). [Up to +5 extra credit, out of 100]
- You can make your pages be responsive. This means that as the width decreases, the page rearranges. For example, at the width for a phone, you should change the header and foot menus into using the "hamburger icon", like the class web page does (hint: the class web page uses bootstrap to do this, but you are not allowed to use any libraries, so you will have to code this directly using a @media entry in the css file). You might also change how the products page is layed out when the screen is narrow. [Up to +5 extra credit, out of 100]
Setting Up Your Github Repo
To submit this assignment, you will host your code in a private Github repository, post it to a public link using Netlify, and enter this link in a README file (described below) that you upload to Canvas. The following sections will walk you through the process of doing this.
If you prefer a video instruction, our TA, Clara Cook, made a helpful video: https://www.youtube.com/watch?v=uWs2NlS5oIw
(See pictures below. Click on a picture for a larger view.)
- Go to Github and Sign In/Sign Up.
- On the left side bar, click the "new" button next to "repositories".
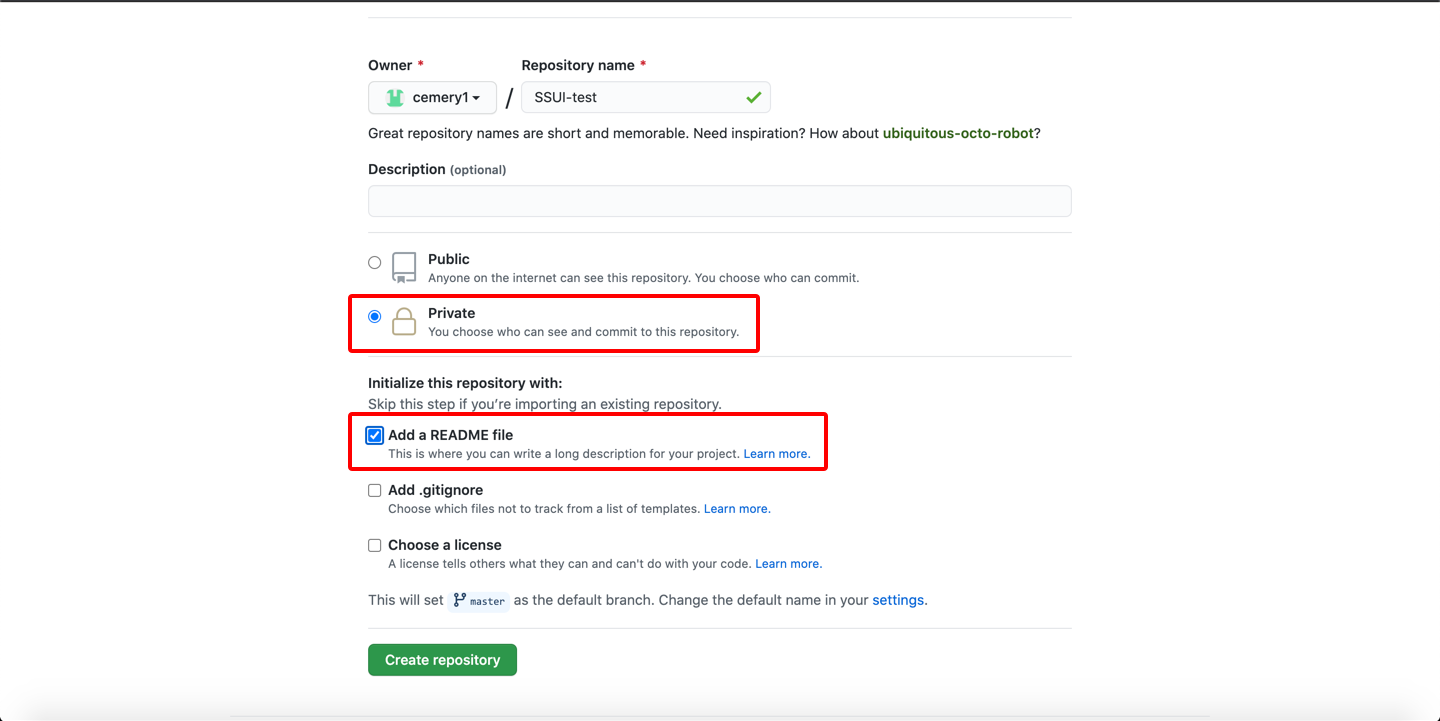
- Name your repository "SSUI-homeworks", set it's visibility to private, and add a README file (this will be the README file mentioned at the beginning of this section).
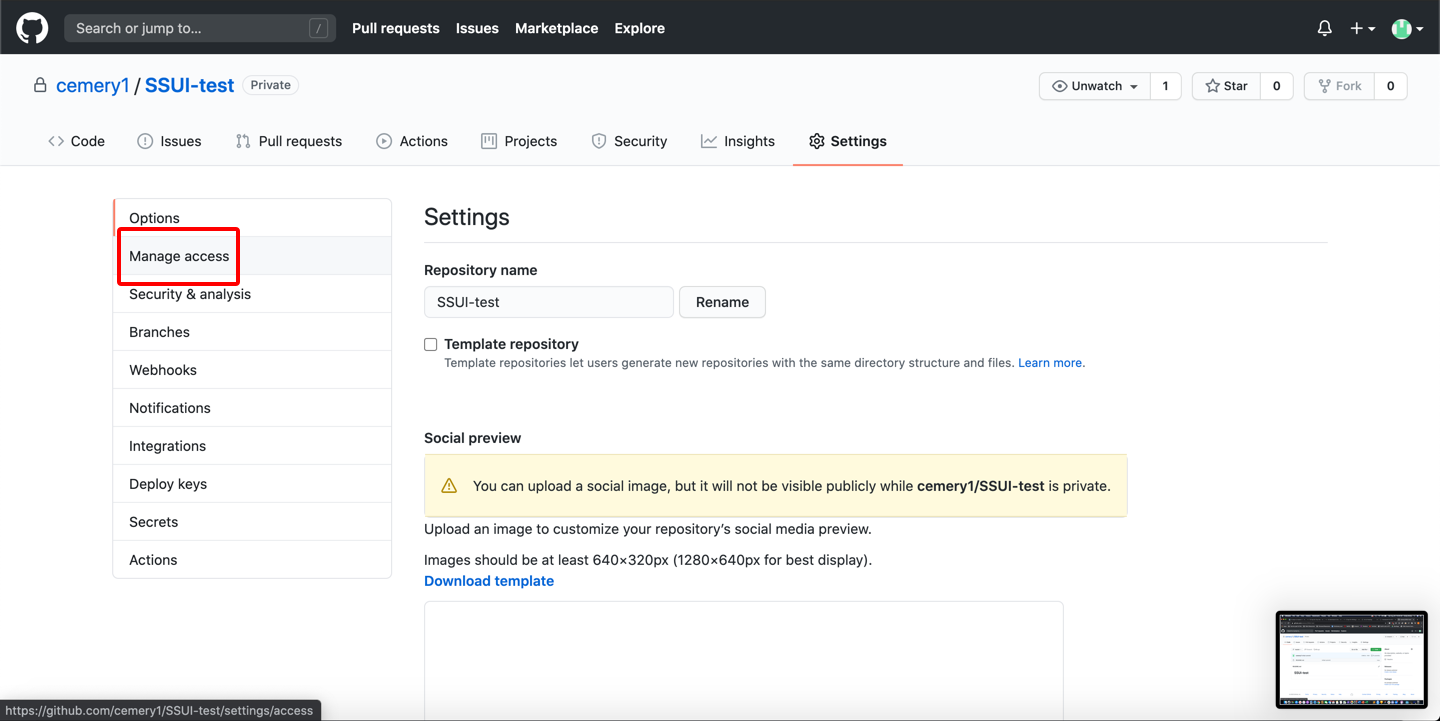
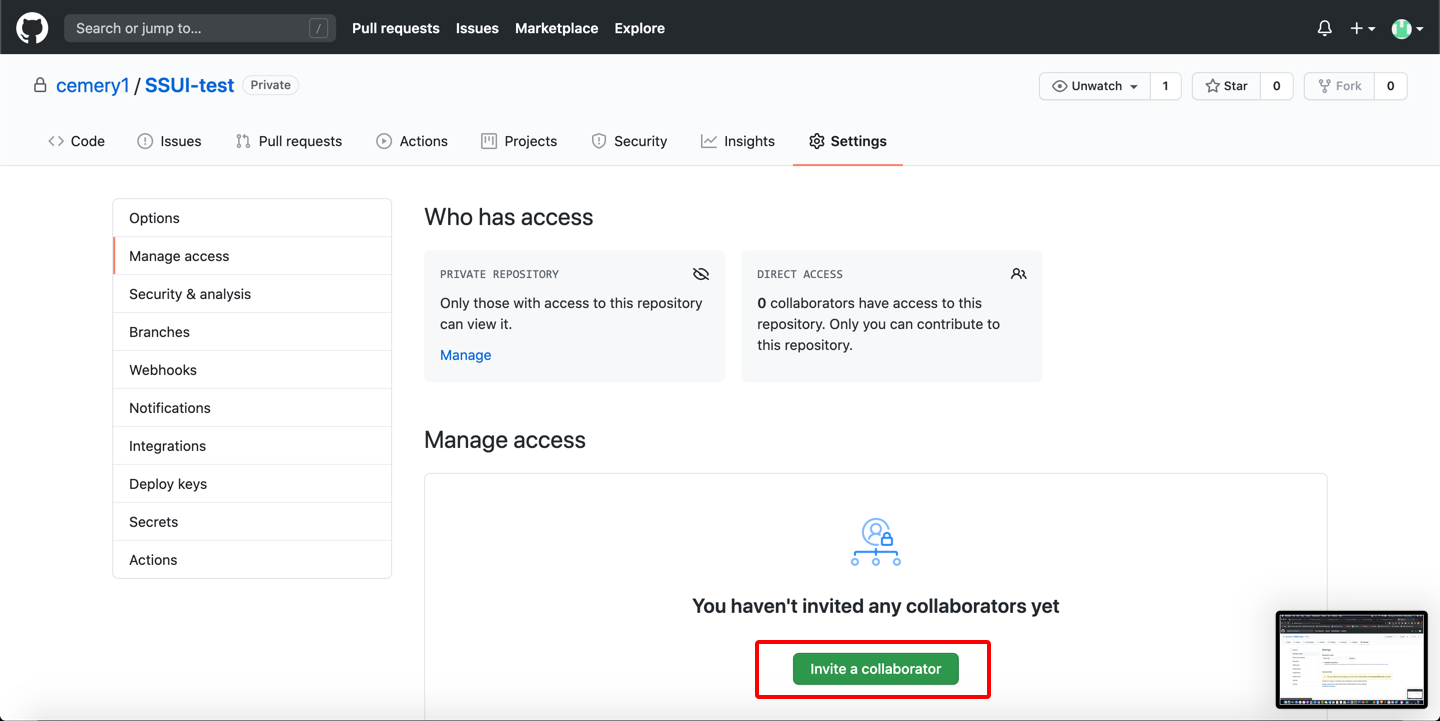
- Click the settings button for the repository, then from there click "Manage access" on the left navigation bar, and click "Invite a Collaborator". Add the following usernames: bradamyers, claracoo. (Hint: you need to add each of us separately, and you need to click twice - once to confirm who it is, and a second time to actually add us.)
- We recommend downloading Github Desktop to easily edit your code locally and commit changes to Github. Once downloaded and connected to your account, from your "SSUI-homeworks" repository click the "Code" button and "Open with Github Desktop" and follow the instructions to create a local copy of the repo on your computer.
- Copy the starter code into your local folder (note: do not copy the folder itself, copy only the contents, so the html files are at the top level of the repository). As you build your site, commit your changes using Github Desktop.
Hosting Your Site on Netlify
- Once you finish your site, go to Netlify. (You can also start doing this much earlier as a way to test your site if you want.)
- Log in to Netlify using your Github account. (Hint: use the Log in button on the first page even if you haven't used Netlify before. Then use the black GitHub button. Then "Authorize netlify" when asked.)
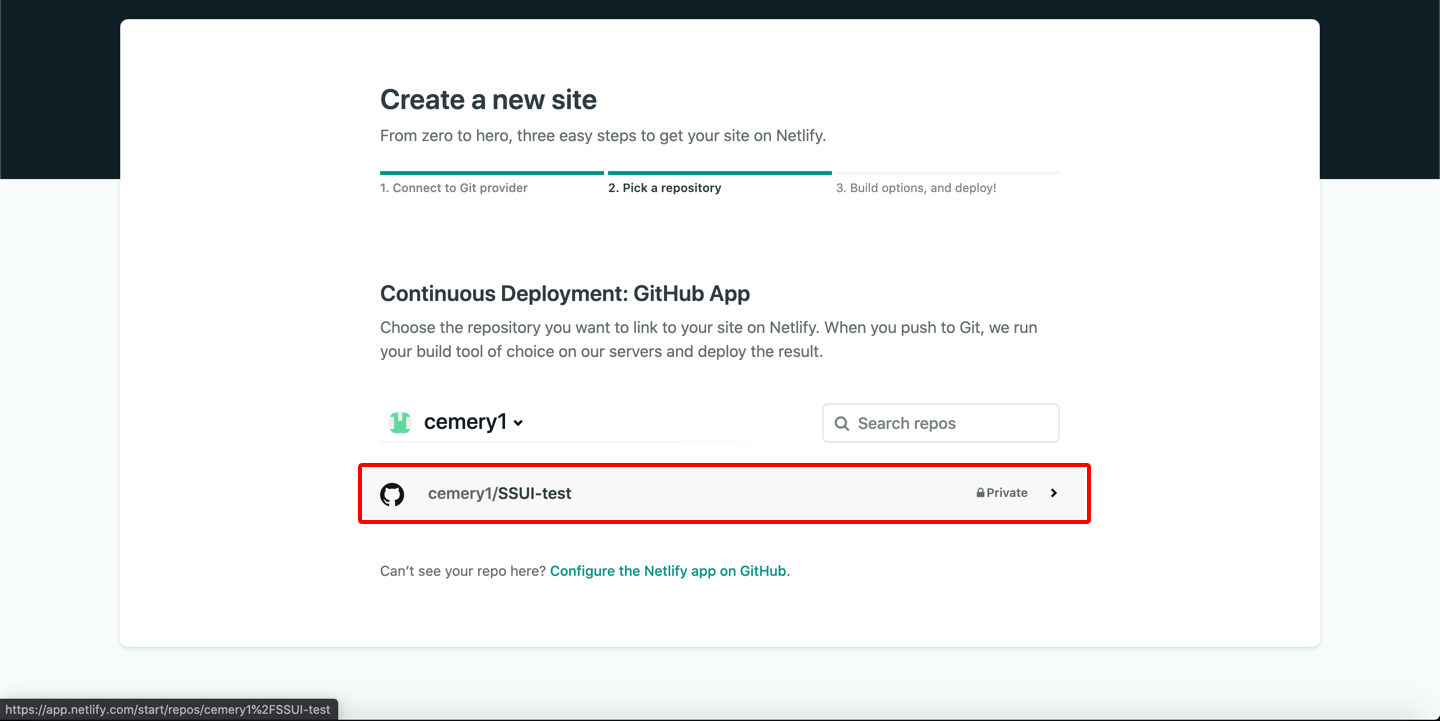
- Click on "New Site from Git", select "Github" under "Continuous Deployment" and allow access to your Github account (again). You may be prompted to install Netlify.
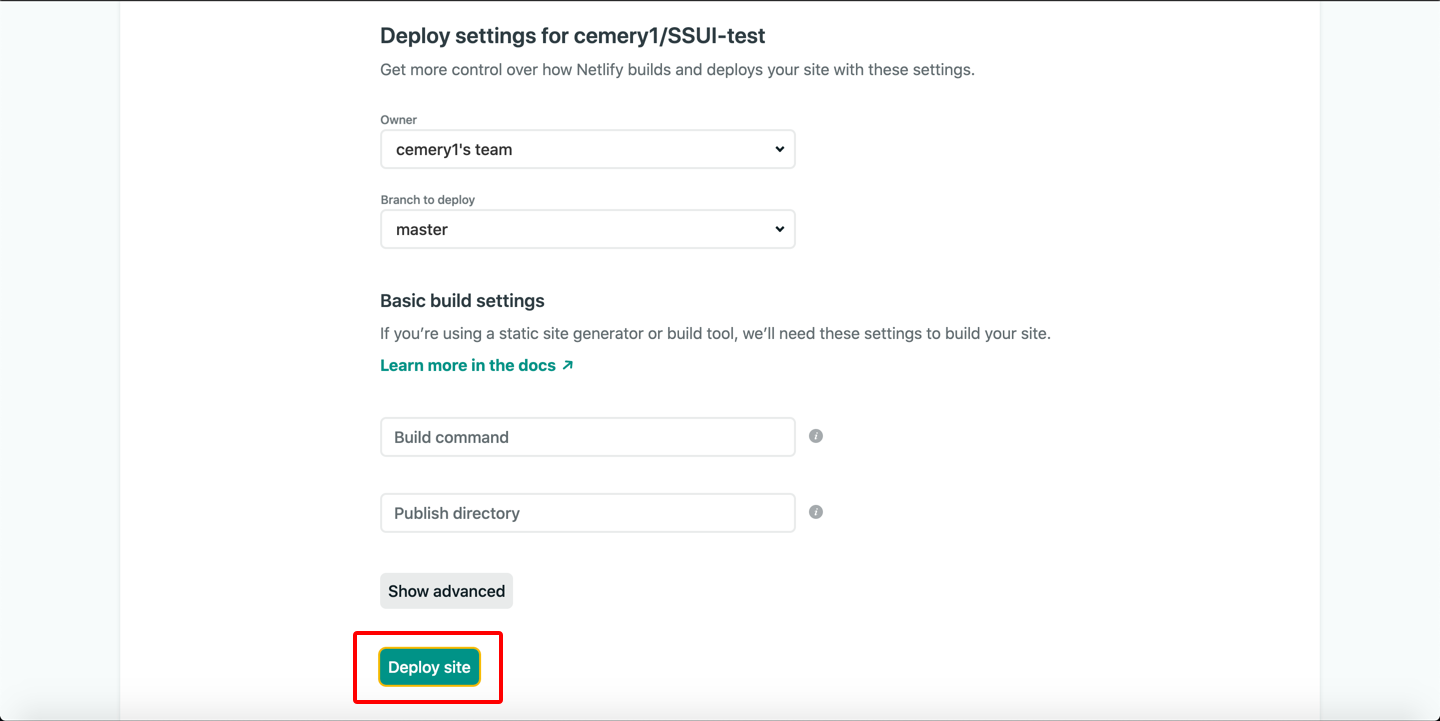
- Search for your repository name, and click on it. Then click "Deploy Site".
- Find your site's URL, and enter this into your README file, and then submit the README file to Canvas by the deadline.
Turn In
In addition to your code, you need to have a README file, which can be in plain text, Microsoft Word, pdf, or .md format, which should contain:
- Your site's URL on Netlify, and the URL of your Github Repo.
- A description of
- your testing, including describing any extra shirts.js files you turn in.
- Any extra credit work you did, and what the user interface is to make it happen.
- Anything else of interest in your design or implementation.
Please upload this README file to Canvas by 9/9/2021 at 3:05pm ET.
We will also check the timestamp of your last Github commit to ensure this was completed on time.

