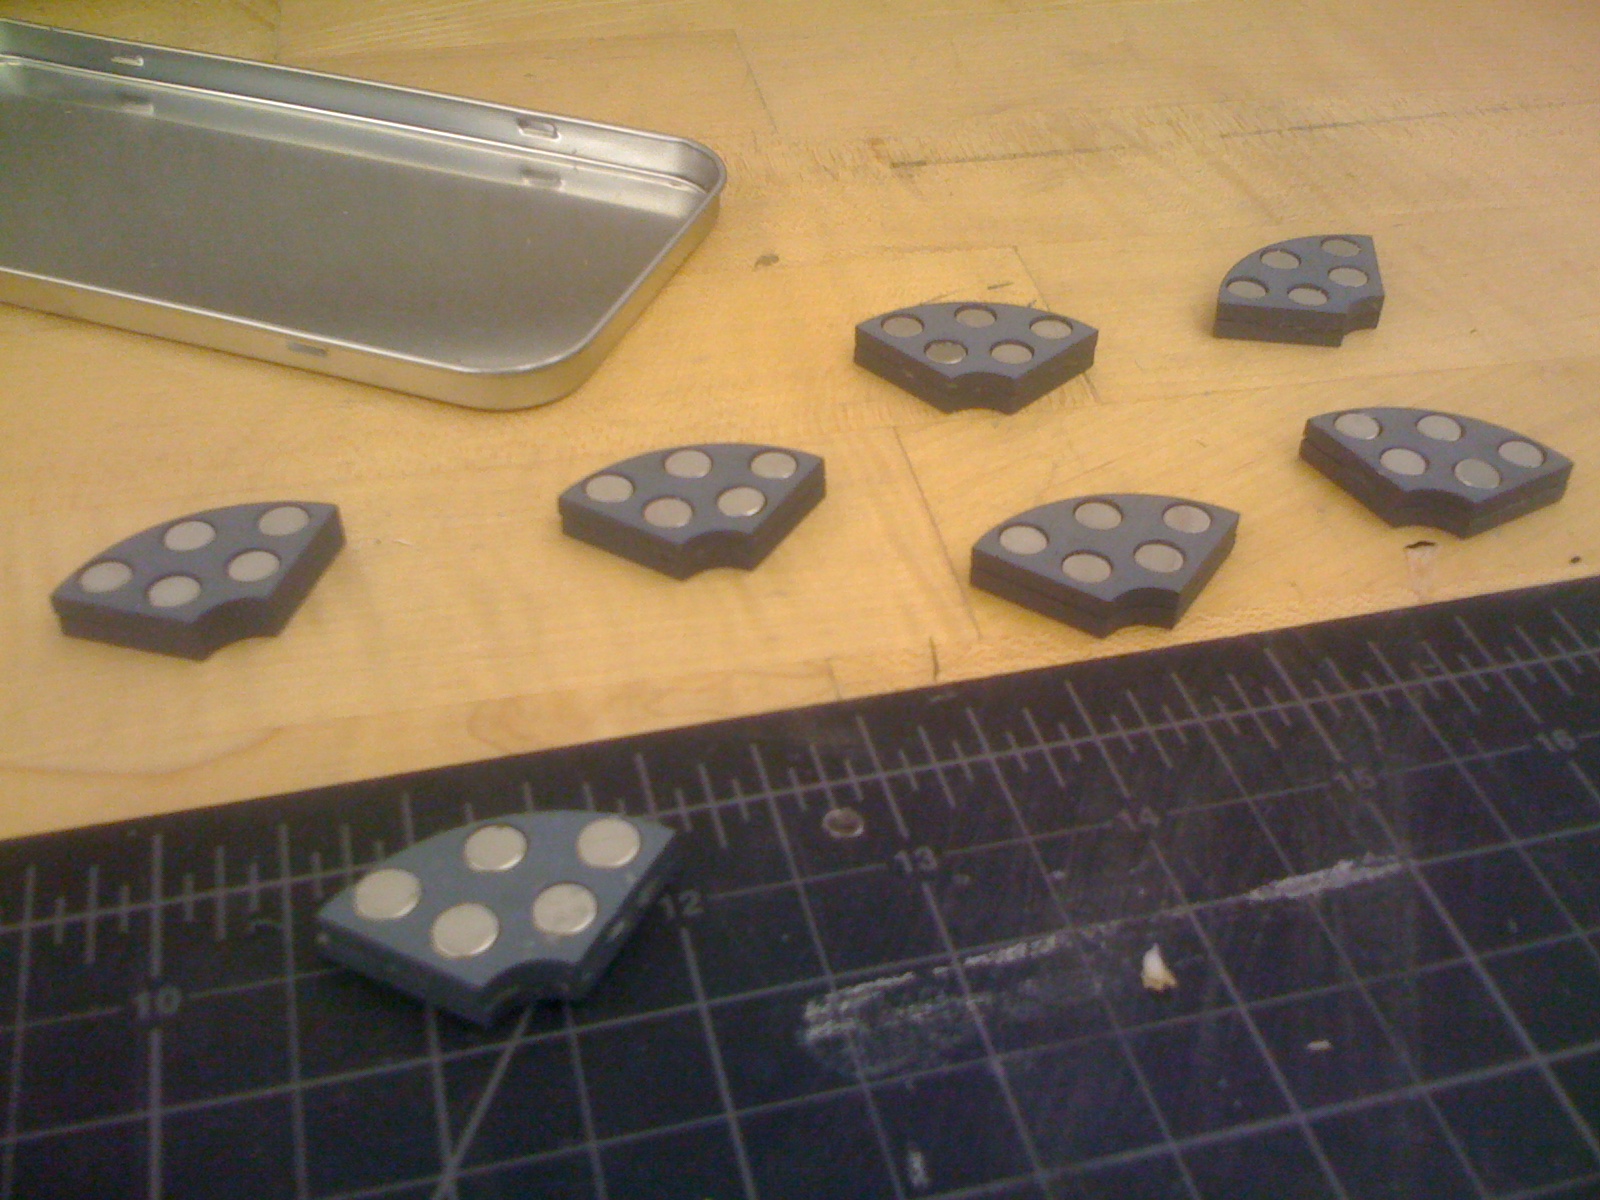
After the pieces of the glove were laser cut we attached the 2 pieces (one with holes for magnets and one solid piece) using tacky glue. Once that dried we started to place the magnets into the holes (with the same polarity as the ball facing up thus making the two repel), using super glue to keep them in place.
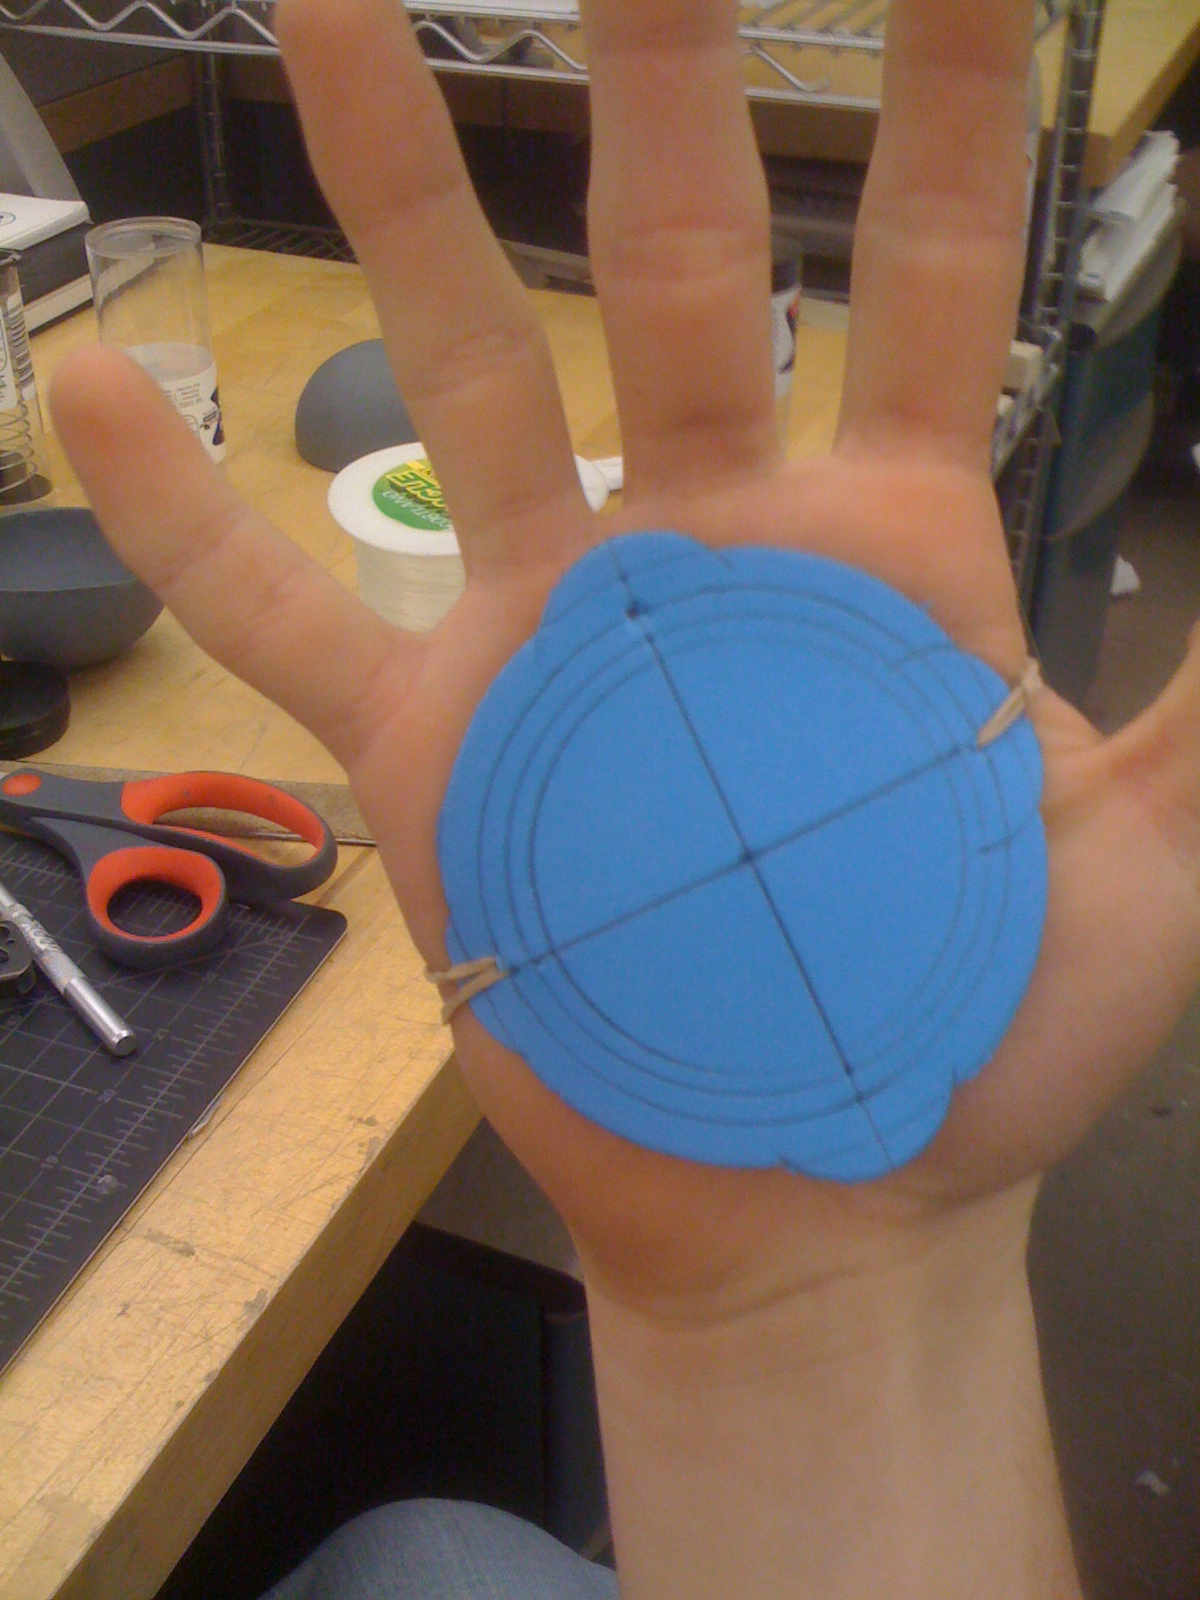
After repeating this process 8 times (4 for each hand) we cut out a base from Fun Foam with a diameter of 3 inches and semicircles at 0,90,180,270 degrees.
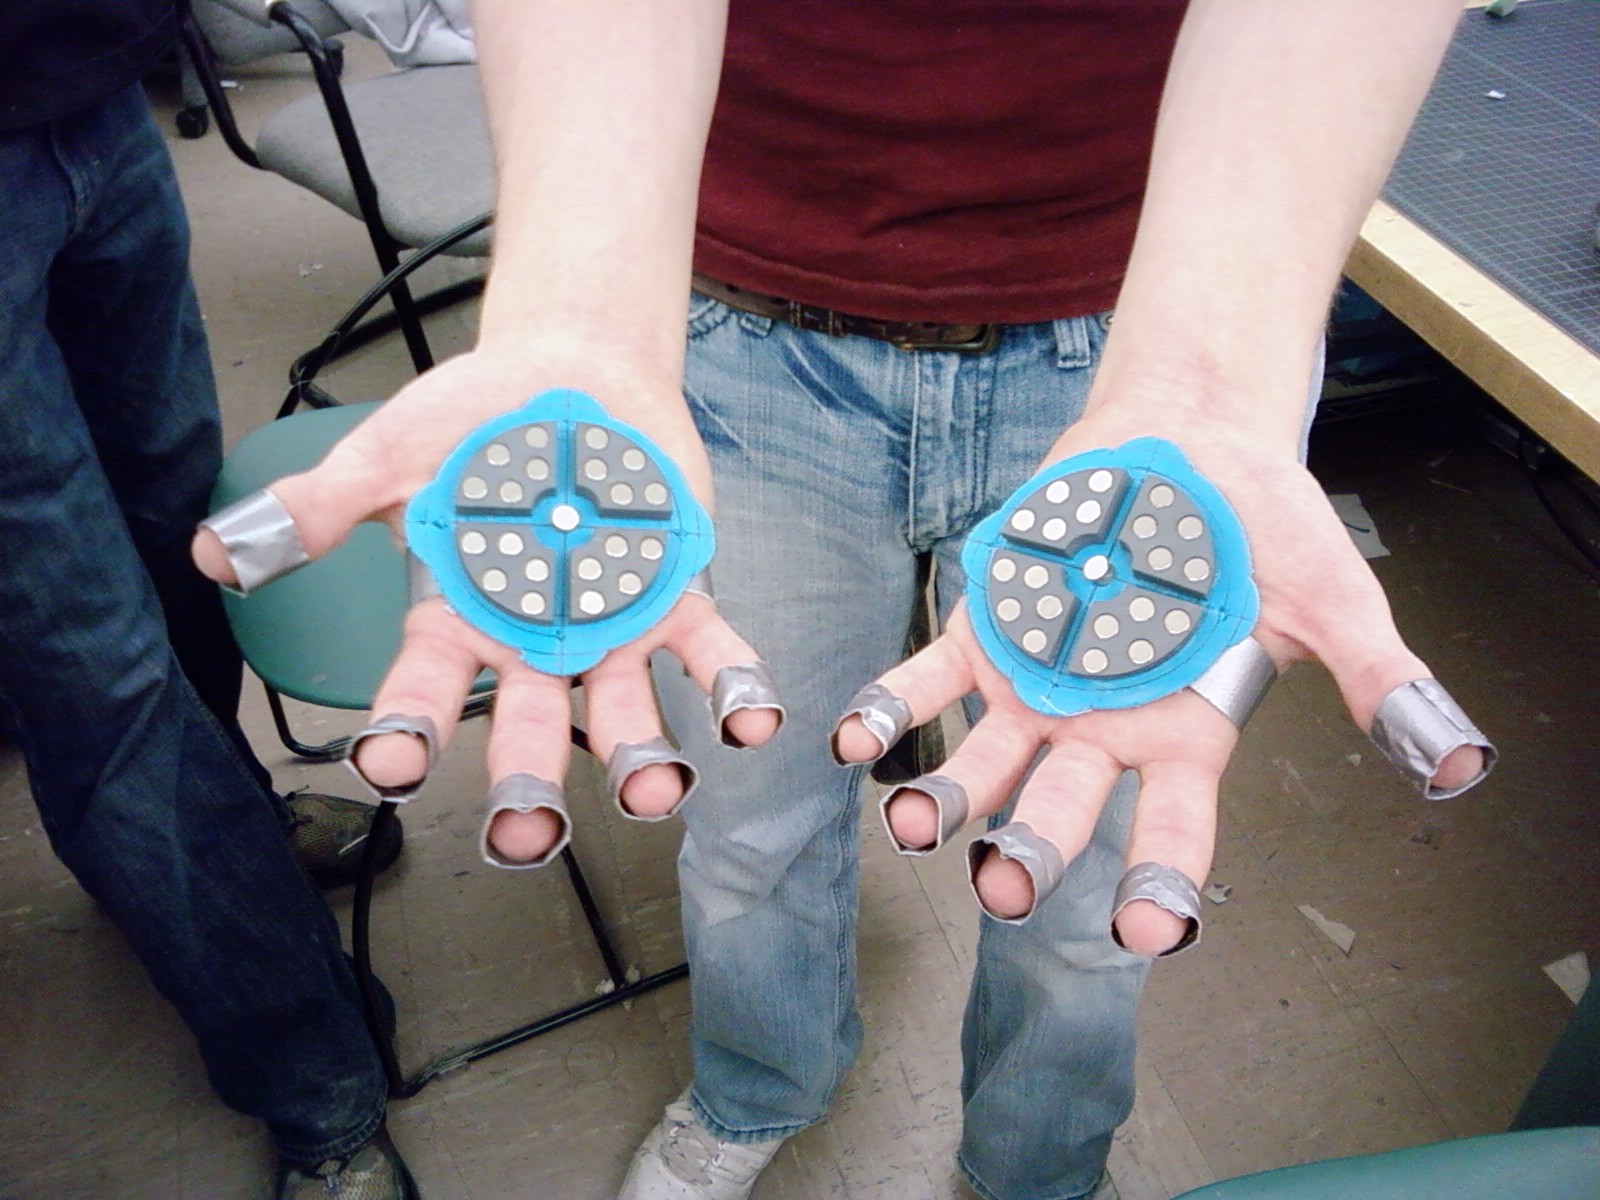
Then using super glue we attached 4 of the wooden parts in a circle on the foam with about 1/8 inch space between the each side. Then in the middle of of the wooden circles we attached 2 more magnets. We repeated this step once to form the gloves for both hands. Once the wooden pieces were attached to the foam using a long strip of duct tape we attached a strap to the back of the glove. We took the tape (about 12 in long by 1/2 in thick and made a loop and then folded it over itself. Then using many more strips of duct tape we attached it to the back of the Fun Foam.
To make the finger tip stabilizers for each hand we (using Brian's hand as a model) made duct tape loops very similar to the method above, but this time putting a single magnet on the inside of the tape (facing such that the polarity outward was the same as the outward polarity of the glove) and making the loops snug with the model hand so that they do not fall off. Repeat this for the opposite hand.
And thus the gloves are finished.
Introduction | Material and Preparation | Vacuum-Forming Machine | Laser Cutting | Assembly of Ball | Assembly of Gloves | Final Product
KinHang Leung
Asa Berg
Brian Mizrahi
Carnegie Mellon University
March 2, 2010