A simple yet challenging puzzle for kids
A simple yet challenging puzzle for kids
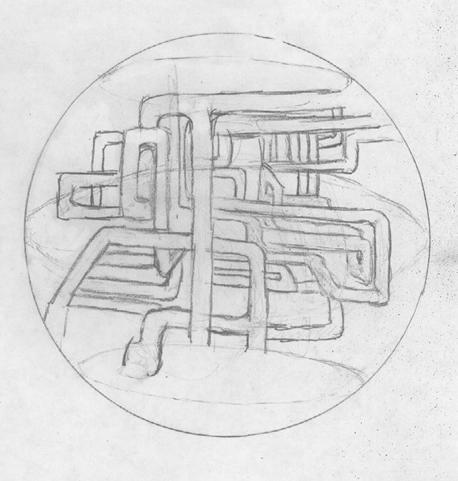
Original Design/Concept:
3D tube maze where the object inside will move via buoyancy by rotating the sphere. Kids can play it in the bath or pool, toy is design to float so that they can spin and play with it on the water surface. Toy should be safe and fun to play with for all ages. For infants and young children the toy should be constructed of a more durable material, bigger sphere and simpler tube maze inside. For people of older age the the tube maze inside could be more complicated. Kids can't swallow it, and the toy should be fairly light, so it should be pretty safe. Construction could be tough, as the interior of the sphere is a intricate tube maze, so the cost may be around 30$ or more. The drawing of the original design is shown above.
Issues:
Our main issue was the manufacturing part of the toy. Creating a clear see-through sphere was simply too expensive and difficult to manufacture. In addition to that, the tube pipes within the sphere were also required to be clear as well. This was very difficult since the tubes needed to be bent and hollowed out for the bead to go through. As result we had to rethink our design from the beginning. We discussed and decided that the most important factor of our toy that makes it unique is that the child has to maneuver the toy such that the bead inside will move through obstacles and reach one end of a toy to the other. We tried to find usable materials that we could use to construct the toy and came upon a clear tube pipe, caps, and a solid aluminum bar with the same diameter as the pipe's inner diameter. With these we constructed the toy as shown in the pictures.
In the end we constructed the tube maze. The objective should be instinctively recognized by the child as the bead is to be maneuvered from one end to the other. The toy may look simple but it can actually prove to be quite a challenge as the bead tend to circulate the sides where the toy is moved too sudden.
Manfacturing:

The toy was relatively simple to manufacture, and only took a few hours in the shop. Using the raw materials including the clear tube, caps for the end of the tube, and the bead, we then found an aluminum rod with a diameter similar to that of the tube. We used the laithe to grind down the aluminum's diameter to equal the inner diameter of the clear tube, so it would fit in nicely. We also used the laithe to cut the aluminum into specific thicness for equal pieces. After the pieces were cut, we used a milling machine to put a hole in the pieces. To make the pieces attaractive, we took them (as well as the end caps) to the sand blaster. We put a glass bead finish on the pieces. Shown on the right are before and after pictures from the glass bead finish. The leftmost picutre is of the endcaps, and the rightmost picture is of the puzzle pieces. Clearly, the finishing really put a nice touch on our final product. Once that was done, we used the bandsaw to cut the clear tube to our desired length, cleaned it out, and proceeded to assemble our toy. The final product came together nicely, producing a simple yet difficult toy for kids. Shown Below is the pre-assembled final product.

<Dave O'Connor, Justin Yi, Konstantin Vidensky, Keshav Raghavan>
Carnegie Mellon University
May 10, 2009