Urethane Molding


Section A 

  • Chris Muenzer
  • Kenn Oldham
  • Kanit Nangkala

Section B 

  • Mark Bartolomeo 
  • Matt Carlson 
  • Robert Fuchs


OVERVIEW

Molding and casting is a manufacturing procedure in which an object is created by introducing material into a mold of the exterior surface of that object, so that the material becomes an exact copy of the object.  The mold can be thought of as a "negative" of an object, a way of transfering the details of the object to another batch of material.  In urethane molding, the mold is created from polyurethane rubber which is poured as a liquid around an object.  When the rubber hardens, the object is removed and the cavity created is used to produce duplicates.  These duplicates are made of a hard, rigid urethane compound, also introduced into the cavity as a liquid.  The resulting piece is capable of displaying very accurate details of the original. 

Urethane molding is not strictly a prototyping technique.  Molding requires a premade piece to be used as a master for the mold.  This master piece must be manufactured through some other process, such as LaserCAMM, stereolithography, or some other prototyping system.  More likely, molding will be used to duplicate objects that have already been produced.  Notably, unlike the prototyping systems listed, molding is a purely physical, rather than digital, process.  The part design is transmitted from piece to piece by a physical imprint upon the mold, not a computer file or drawing..  Nevertheless, urethane molding is a simple and useful method of producing many copies of a part.


MATERIALS

  • Master piece
  • Por-a-Mold 6111 two-part mold making system (curative and prepolymer)
  • Por-a-Kast Mark 1 two-part casting resin (curative and prepolymer)
  • SynLube 1711 release agent
  • Kleen-Klay Regular (non-reactive clay)
  • Safety equipment: goggles, respirator, gloves, lab apron
  • Mold box materials (plastic cup, wooden frame, etc.)
  • Contact paper
  • Tape (preferably double sided)
  • Measuring and mixing containers
  • Knife or scissors


PROCEDURE

In order to make a Urethane Molding, there are 2 main processes 
 

The process described here is for a part that has a flat surface that can be directly affixed to the pouring surface.  For molding all sides of an object, see this page on silicone molding.


Safety First: 

Since we are going to work with the chemicals which are irritable to the skin, safety equipment such as gogles, lab coats, gloves, and respirator should be worn before working. Some of the chemicals we will are vaporized, the working room should also be well ventilated. 
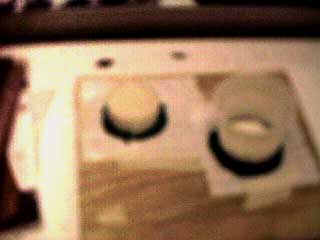


Casting the mold 

  • Create a mold box: The first step in casting a mold is to make a mold box. A mold box can be anything that will hold the liquid chemicals during the pouring. For our mold box, we used a plastic cup with the bottom cut off. 
  • Attach mold box to a base: Since a mold box required one side of contact. The smooth surface board layered with a contact paper will be used to place the mold box on. Kleen Klay Regular will also be used to hold the box in place. 
  • Prepare master piece: The master piece will be placed in the centr of the mold box and secured to the contact paper with double sided tape. In order to prevent the master piece from stuck in the mold, spray the piece with Synlube - 1711 Release Agent must be  before pouring the chemicals. 
  • Mix chemicals: To make a mold, we will use Por-A-Mold S 111 (silicone-polyurethane compound) which begins separately as a curative and a prepolymer. Before using,  these two chemicals must be mixed. The ratio by volume for the curative and prepolymer recommended by company is 1:1.  Measure and combine chemicals, and stir for several minutes.  However, since the mixture will take 15 minutes to harden, do not take too much time to mix the chemicals. 
  • Pour chemicals: Pour the mixture into the mold, but be careful not to have bubbles in the liquid. 
  • Wait for curing:  After pouring the chemicals into the box, lthe mold will take around 24 hours to cure. When the mold is cured, separate the mold from the box using a knife as needed. 


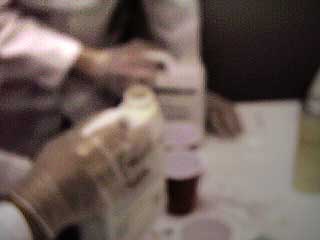
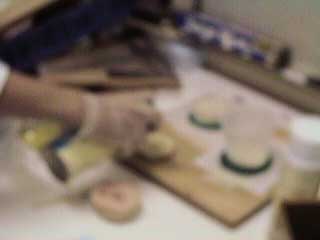
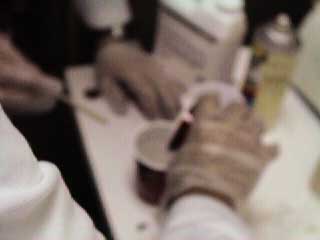
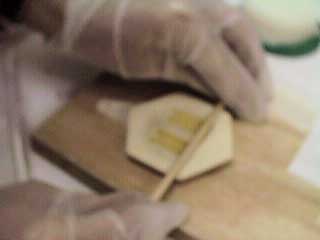
Casting Parts from Mold
  • Set up the work place:  Place a sheet of contact paper on a smooth table surface and have all your materials (chemicals, spatula, beakers, etc) in proximity of your work. The casting process must be done quickly 
  • Clean the mold:  Before pouring the casting parts chemicals into a mold, make sure that there is nothing left inside the mold crevices. To prevent the cast from sticking in the mold, spray the cavity with Synlube -1711 Release Agent. 
  • Mix chemicals:  To cast parts, we used Por-A-Kast Mark I, a second silicone- polyurethane compound which is mixed from a curative and a prepolymer. As with Por-A-Mold, mix these two components in a 1:1 ratio of volume. Immediately stir for about 30 seconds to minute. 
  • Pour chemicals: Pour the chemicals into the crevices left by the part in the mold until the voids are filled. The time allowed for mixing and pouring is only about 1-2 minutes. After pouring, use a flat spatula to even out the top of the mold. 
  • Wait for curing: It will take around 30-45 minutes for the parts to harden. Taking the parts out of the mold by simply bending the mold.  The finished part will be a regidm slightly rough plastic-like piece 

Creating a cast with Urethane Molding

Mold Box

Safety Equipment

Measuring Chemicals

Release Agent

Mixing Chemicals

Pouring Cast

Smoothing Cast  


ADVANTAGES

  • Cost 
  • Molding is very cheap when compared to other methods of rapid prototyping.

  • Repetition
  • Molding is a great way to produce a limited quantities of identical parts.

  • Surface Detail
  • We found that surface details and textures, such as engravings or embossings, could be reproduced quite well.

  • Alterations
  • Molding is useful for copying a part in order to attempt alterations or modifications without harming the original.

  • Solid Pieces
  • Solid pieces are much easier to produce than thin pieces. In fact, Por-A-Kast appeared to harden more quickly in the thicker portions of a piece than the thin sections.

  • Material Variety
  • A urethane mold can be used to create casts from wax, epoxy, resin, plaster of paris, and other materials, as well as Por-A-Kast 


LIMITATIONS

  • Moisture 
  • Water is 100 times as reactive as the curative, accelerating the curing process.

  • Heat 
  • Molds are fairly temperature sensitive, cannot endure extended periods of time above 270 degrees Fahrenheit.

  • Complicated Details 
  • Complicated structures are theoretically possible, but very difficult to implement. They involve a lot of hand work to remove casts and excess material, which introduces errors. 

  • Thin Walls 
  • Thin walled pieces are very difficult to cast and remove from the mold. Any air bubbles trapped in the casting materials will cause the cast to become brittle or prevent thin walls from filling completely.

  • Time 
  • Mold takes 24 hours to cure, and casts each take at least an hour.

  • Size 
  • Batch size is recommended to be under a half gallon for the molding mixture. Large parts require a rigid "mother mold" which surrounds the urethane mold.


COSTS

POR-A-MOLD S111

2 qrt. kit

$ 20.00

2 gl. kit

$ 60.00

10 gl. kit

$ 250.00

100 gl. kit

$ 1925.00
POR-A-CAST Mark 1

2 qrt. kit

$ 22.00

2 gl. kit

$ 60.00

10 gl. kit

$ 260.00

100 gl. kit

$ 2125.00
Synlube 1711 release agent

1 aerosol can

$ 6.50

1 qrt. bulk

$ 15.00

1 gl. bulk

$ 55.00

5 gl. bulk

$ 250.00

55 gl. bulk

$ 2500.00

  Additional information on urethane molds and materials can be found at Synair Corporation, producer of Por-A-Mold, Por-A-Kast, and SynLube.