Installation Notes for Serpent on Mac
OS X
Roger B. Dannenberg
There are two versions of serpent; one is a command line program and
the other is a graphical interface program:
- serpent64 -- command line version
- wxserpent64 -- serpent with wxWidgets linked in to provide a
graphical interface
Serpent is currently released as an SVN repository and in three zip files
(the "nnn" is the
corresponding SVN version number):
- serpent64-mac-nnn.zip -
Mac OS X (64 bit) executable and bundle: serpent64 and wxserpent64.app
- serpent-src-nnn.zip -
Source code for any platform (Linux, Win32, OS X), both 32bit and 64bit
- (serpent64-win-nnn.zip
- Win 64-bit executables: serpent64.exe and wxs\wxserpent64.exe)
The "win" and "mac" zip files contain compiled executables. The "src"
zip file contains sources for all platforms. The SVN repository is
described below in "Building From
Sources."
Installing Compiled Programs
You should be able to simply download serpent64-mac-nnn.zip for your 64-bit Mac OS X
machine, extract the executable and application bundle and run them
without getting and compiling the sources, but you need to follow these
instructions and run from the command line...
The executable and application bundle are serpent64 and wxserpent64.app.
Instructions:
- When you unzip the download, you will have a directory named
serpent. Put this directory in your home directory. If it is on the
desktop, move it to your home directory. (If you really want it on your
desktop, that is OK, but you will have to adjust these instructions
accordingly.)
- Your system must be able to find the executables. Move the
executables to a personal directory of executables named ~/bin. The
following commands can be used:
mkdir ~/bin
cd ~/serpent
mv serpent64 wxserpent64.app ~/bin
- You also need a short script to execute wxserpent64 from within
the application bundle, so create the file ~/bin/wxserpent64 with the
following content; be sure to use your userid rather than "rbd":
#!/bin/sh
echo "running wxserpent64 with arguments $*"
/Users/rbd/bin/wxserpent64.app/Contents/MacOS/wxserpent64 $*
- Make ~/bin/wxserpent64 executable as follows:
chmod +x ~/bin/wxserpent64
- You then need to modify your ~/.profile to set your PATH and
SERPENTPATH variables. Edit ~/.profile and append the following lines;
be sure to use your userid rather than "rbd":
export PATH=$PATH:/Users/rbd/bin
export SERPENTPATH="/Users/rbd/serpent/lib:/Users/rbd/serpent/programs:/Users/rbd/serpent/wxslib"
- Close and reopen the terminal window to start a new shell.
Testing: Try these commands:
cd
serpent64
> print "hello world"
hello world
> exit()
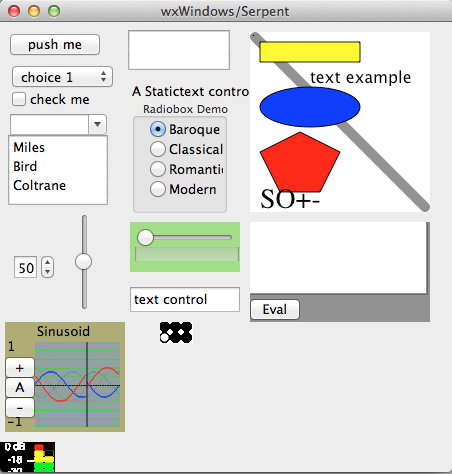
Try
wxserpent64 wxs_test.srp
to test wxserpent64 and see a variety of input controls. The screen
will look something like this:
Diagnosing Problems
If the installation does not behave as described above, the problem may be that your ~/.profile
is not being loaded when you start a shell. You can check to see that
SERPENTPATH is defined by typing (in a terminal window, of course):
echo $SERPENTPATH
If you do not see the long path string you created earlier, your export SERPENTPATH=... command is not being run in this shell. If you have a ~/.bash_profile file, it is probably taking priority over ~/.profile, and you should either move everything from .bash_profile to .profile and delete .bash_profile, or vice versa. You might want to add
echo "My .profile file has been loaded"
or something similar to your .profile and/or .bash_profile so that you can see what is being loaded when you start a terminal window.
Similarly, you should have your bin directory on your PATH. You can inspect the path with
echo $PATH
Building From Sources
If you want to build OS X versions from sources, get the "src" zip
file. You can also get the very latest sources from SourceForge using
SVN (subversion, a configuration management tool). The shell command to
create a serpent directory (in the current directory) with the latest
sources is:
svn checkout svn://svn.code.sf.net/p/serpent/code/trunk serpent
or, if you are a developer and plan to commit changes back to
SourceForge,
svn checkout svn+ssh://rbd@svn.code.sf.net/p/serpent/code/trunk serpent
Important: If your serpent
directory contains trunk,
tags, and branches, check the code above
and try again. For these instructions to work, all the
repository files in trunk
must be copied to the local working copy named serpent. E.g. you should have serpent/README.txt, serpent/32bit, and serpent/64bit. After you
install liblo, you should
have serpent/../liblo.
The source files can be built as follows:
Mac OS X (Ver. 10.9.5, gcc 4.2.1, wxWidgets 3.0.2, Xcode 6.2, CMake
3.5.2, MacOSX10.9.sdk)
- You must have Xcode, which is available
free at the Apple App Store.
- You must also have installed "command line tools" from https://developer.apple.com/xcode/
- If you have more than one version of Xcode, you can check
which version will be run from the command line using:
sudo
/usr/bin/xcode-select -print-path
and if it is not the newest version, you can change it by typing:
sudo
/usr/bin/xcode-select -switch
/Applications/Xcode.app/Contents/Developer
- I assume you use the bash shell. If not, either switch to bash,
start a bash shell just for serpent, or adjust the syntax of the
commands given below to work with your shell.
- You must install CMake.
For OS X, this will be an ordinary application you run by
double-clicking on the CMake icon in the Applications folder.
- [Serpent now has 2 versions of Open Sound Control. Unless you
need to process timed messages or bundles, I recommend the built-in
version. Otherwise, you need liblo, as follows:
- Download liblo
at the same level as serpent, e.g. /home/rbd/liblo, /home/rbd/serpent.
Notice the directory is liblo, not liblo-0.26 or some
other name. Within liblo, you should find a file named configure
along with many other files, not a directory named liblo-0.26.
(Notice that we are getting these sources from a downloaded tar file,
not via svn.)
- Download zeromq at
the same level as serpent, e.g. /home/rbd/zeromq. (You can use other
directory names, but this is the default name assumed by CMake. If you
pick another name, e.g. zeromq-4.1.4, you'll have to enter the name
into CMake as the ZMQ_BASE_PATH.) Instructions for building zeromq
appear below.
- Download libsodium, which is used by zeromq. In my installation,
expanded the download into libsodium-1.0.10 at the same level as
serpent, e.g. /home/rbd/libsodium-1.0.10, and I created a symbolic link
named libsodium, e.g. in my home directory I ran ln -s libsodium-1.0.10
libsodium.
- install PortMidi
in portmedia at the same level as serpent, e.g.
/home/rbd/portmedia/portmidi, /home/rbd/serpent, /home/rbd/liblo.
Details on portmidi installation for the Macintosh are here.
- build PortMidi (see documentation in Installing
PortMidi on the Mac). Note that you will probably have to
tell CMake where to find the SDK to build a 32-bit version. The default
may be 10.7, but for 32-bit wxserpent, you will need MacOSX10.6.sdk. (I
have stopped making 32-bit wxserpent because Apple has dropped support
for the libraries needed.) The location (on my system, with a default
Xcode installation) is
/Applications/Xcode.app/Contents/Developer/Platforms/MacOSX.platform/Developer/SDKs/MacOSX10.6.sdk
Be sure to get and install PmDefaults as well.
- build liblo if you want to use it
cd liblo
arch_flags="-arch x86_64"
Note: for 32-bit version, use arch_flags="-arch i386"
./configure CFLAGS="$arch_flags" CXXFLAGS="$arch_flags" CPPFLAGS="$arch_flags" LDFLAGS="$arch_flags" OBJCFLAGS="$arch_flags" OBJCXXFLAGS="$arch_flags" --enable-static
make
mkdir Release
cp src/.libs/liblo.a Release/liblo_s64.a
Note: for 32-bit version,
cp src/.libs/liblo.a Release/liblo_s.a
- the Serpent code assumes the portmedia, liblo, and serpent
directories all share the same parent, e.g. your home directory
- You may need libpng.a, but skip this item for now. I installed
this with macports, which puts it in /opt/local/lib/ along with
libpng*.dylib, which you do not want. I used
- mkdir -p libpng
- sudo cp libpng*.dylib libpng
to "hide" the dylibs from the linker, forcing it to use the static
version. Note that the linker command -lpng could be more specific, but
the flag is generated automatically by wxWidgets, so it is hard to
change.
- for wxserpent64 (the 32-bit version is no longer supported),
download wxWindows 3.0.
- before going further, patch include/wx/strvararg.h by adding this:
#ifdef _LIBCPP_VERSION
// using libc++
#define HAVE_TYPE_TRAITS
// note: this was not the case when wxWidgets library was compiled!
#else
// using libstdc++
#define HAVE_TR1_TYPE_TRAITS
#endif
before the line
#if defined(HAVE_TYPE_TRAITS)
which is around line 25.
- Ignore the directions in the INSTALL-MAC.txt file that comes with
wxWindow 3.0, and use this instead:
cd wxWidgets-3.0.2 <- this is the directory of wxWindows sources,
                   <- the full path will be the value of WX_BASE_PATH (see below)
                   <- this example is obviously for wxWidgets-3.0.2, but use the
                   <- actual directory name for your wxWidgets sources if it differs.
mkdir wx-build
cd wx-build
arch_flags="-arch i386"
../configure --with-osx_cocoa --prefix="$(pwd)" --with-opengl --enable-monolithic --disable-shared  --with-unicode
make
To make configure work, assuming you are using autoconf
installed as part of Xcode's installation, you might have to do this:
cd /usr/share
sudo ln -s /Applications/Xcode.app/Contents/Developer/usr/share/autoconf
But there's no need for such a crufty hack unless you see automake
errors about not finding files.
You might also have to add /Applications/Xcode.app/Contents/Developer/usr/bin
to your PATH in order to run configure or automake.
Note also that all libraries and applications must be built
with the same SDK version. This assumes you are using
/Developer/SDKs/MacOSX10.6.sdk as the Base SDK, but for earlier systems
or compatibility with earlier systems, you might have to adjust this.
If you later get errors when linking Serpent such as Undefined symbols:
"_popen$UNIX2003", referenced
from:..., this means you are trying to link a library that was
compiled against an earlier SDK and Serpent is linking against a later
SDK.
For Xcode 6, you might have to patch wxWidgets in order to
compile wxSerpent. The patch is to insert the following lines after #include "wx/unichar.h" in wxWidgets-3.0.2/include/wx/strvararg.h:
// detect std::lib
#ifdef _LIBCPP_VERSION
// using libc++
#define HAVE_TYPE_TRAITS
#else
// using libstdc++
#define HAVE_TR1_TYPE_TRAITS
#endif
Also, if you get an error message about "wcsstr
ambiguous," try adding
list(APPEND COMMON_DEFINITIONS "_WCHAR_H_CPLUSPLUS_98_CONFORMANCE_=1")
to serpent/src/serpent.cmakeinclude just before "message(STATUS
"COMMON_DEFINITIONS" ${COMMON_DEFINITIONS})".
- If you want to use zeromq, install libsodium first:
- If you want to use zeromq, build the zeromq library:
- Note that here we configure to use libstdc++, which is also
used by wxWidgets. The standard configure will not work.
cd zeromq
./configure --disable-shared --with-gnu-ld LDFLAGS="-lstdc++ -stdlib=libstdc++ -mmacosx-version-min=10.11" CXXFLAGS="-stdlib=libstdc++ -mmacosx-version-min=10.11"
make
make check
- If errors come out in the previous step, there's either a
change in zeromq or your computer needs some additional software.
Please resort to the zeromq website above.
- Next, we install zmq so that Serpent can find the header files, and we move the library where CMake can find it.
sudo make install

mkdir -p lib
cp src/.libs/libzmq.a lib/libzmq_s.a
- use CMake to create serpent.xcodeproj from serpent/CMakeLists.txt
as follows:
- For "Where is the source code:" and "Where to build the
binaries:", use the serpent directory, e.g. /Users/rbd/serpent/64bit.
- Be sure to check USE_GLCANVAS, which may be a sub-menu item
under "USE". (Alternatively, you can probably build wxWindows without
the --with-opengl flag,
in which case you should uncheck USE_GLCANVAS, and wxserpent will be
built without OpenGL canvas and functions).
- There are other options:
- HAVE_WX_PACKAGE -- if your system has wxWidgets installed,
CMake should be able to automatically find the libraries and link to
them, avoiding the need to build your own version of wxWidgets. To do
this, check HAVE_WX_PACKAGE. This will probably use dynamic libraries
for wxWidgets, so if you move the application to another system, it
might fail unless you install the same version of wxWidgets libraries
there.
- USE_MIDI -- include functions that access PortMidi library
(see "Serpent and PortMidi").
- USE_NETWORK -- include functions that access network
functions (see "Network Interface and
Functions").
- USE_OSC -- include functions that access Open Sound Control
(see "Open Sound Control").
- USE_LIBLO -- only matters if USE_OSC is checked. Not
recommended unless you need to parse incoming messages with timestamps
and/or bundles.
- USE_STATIC_LIBS -- recommended. If not checked, will try to
use existing libraries. In principle, this could save work installing
and building libraries from sources, e.g. wxwidgets and portmidi, but
if the build fails, you should USE_STATIC_LIBS to reduce possible
version and path problems.
- USE_THREAD -- include functions that support a second
real-time thread (see "Thread Interface
and Functions").
- USE_ZMQ -- include zmq support (see "ZeroMQ").
- change WX_VERSION to 3.0
- consider setting CMAKE_OSX_DEPLOYMENT_TARGET and
CMAKE_OSX_SYSROOT to use a particular version of the SDK. If you
compile with a 10.9 SDK you cannot run on 10.7, for example.
- Press configure (button)
- After the configure button (the first time), a window prompts
for: "Specify the generator for this project." Select "Xcode" from a
drop-down box.
- Click the Done button.
- Press configure (button) again.
- One possible error will complain "There is no SDK with the name
or path '/Developer/SDKs/MacOSX10.6.sdk'. I found the SDK on my machine
in:
/Applications/Xcode.app/Contents/Developer/Platforms/MacOSX.platform/Developer/SDKs/MacOSX10.6.sdk.
Wherever MacOSX10.6.sdk resides, you should define CMAKE_OSX_SYSROOT to
have that path. Alternatively, you can make a symbolic link from
/Developer/SDKs/MacOSX10.6.sdk to
/Applications/Xcode.app/Contents/Developer/Platforms/MacOSX.platform/Developer/SDKs/MacOSX10.6.sdk.
You should see CMAKE_OSX_SYSROOT in the large upper panel of the CMake
interface.
- Press Generate.
- Do not change the AURA_DEF value from FALSE.
- Find WX_BASE_PATH. Set the value to your wxWidgets folder where
you installed wxWindows. E.g. my Value string is "/Users/rbd/wxmac"
(without the quotes).
- Find WX_VERSION. This should be 3.0 if you are using wxWidgets
3.0.2.
- This generates serpent/64bit.xcodeproject
- If you use Mac ports (like I do), there will probably be a
conflict between the iconv library for Xcode and the one installed by
Mac ports (probably because something else depends on it, so it's not
simple to just remove the Mac port iconv library alone). To solve this
problem, I resort to the awful hack of "hiding" the Mac port iconv
library when I build serpent and wxserpent. I create
/opt/local/lib/libiconv-hidden and use a shell script inside
/opt/local/lib as follows:
#!/bin/sh
mv libiconv.2.dylib libiconv-hidden/
mv libiconv.a libiconv-hidden/
mv libiconv.la libiconv-hidden/
mv libiconv.dylib libiconv-hidden/
This will of course break several programs installed by Mac ports, so I
undo the hiding with another shell script named
/opt/local/lib/libiconv-unhide.sh which is
#!/bin/sh
cp libiconv-hidden/libiconv.2.dylib .
cp libiconv-hidden/libiconv.a .
cp libiconv-hidden/libiconv.dylib .
These must be run under sudo, e.g.
cd /opt/local/lib ; sudo sh -v ./libiconv-hide.sh
Please do not try this unless you see linker errors containing "iconv" when you build with Xcode in the next step.
- open serpent.xcodeproj
- change project settings for Apple LLVM 6.0 - Language - C++, C++
Standard Library from "Compiler Default" to "libstdc++ (GNU C++
standard library)"
- build ALL_BUILD using the "Product:Build For:Archiving" menu
item. (Editorial note: Isn't this an odd command name for building the
release version of a program? Note that the Build menu and the Archive
menu are not equivalent.) If you are not building wxwindows, you can
just build serpent.
- To make your installation look like the downloaded binaries, move
wxserpent64.app to serpent:
mv ~/serpent/64bit/wxsbuild/Release/wxserpent64.app ~/serpent
(Otherwise, you can set things up to run directly from
serpent/64bit/wxsbuild/Release/.)
- Now that you have compiled executables, you can follow the instructions above for installing them.