Tetris for Intro/Intermediate Programmers (Fall 2026 version)
Step 5: Rotating the fallingPiece
- Now we move on to the most difficult part of the project: in response to up-arrow key presses, we should rotate the falling piece 90 degrees counterclockwise. We do this in the same way we handled other changes to the falling piece: we make the change, test if it is legal, and if it is not, we unmake the change.
- As noted, this function (which takes one parameter, app) is similar to moveFallingPiece, in that it makes the rotation and then calls fallingPieceIsLegal and undoes any illegal changes. The actual rotation is accomplished by changing the two-dimensional list of booleans that represent the falling piece. A new 2d list is created, and cells in the old list are mapped to cells in the new list according to a 90-degree counterclockwise rotation. To see how this works, consider this picture, which shows a piece that is rotated counterclockwise. The cells of the piece have been labeled with numbers to make the rotation clear (you do not need to add these numbers yourself).
- Rotating the piece algorithmically will require updating two parts of app: the piece's dimensions and the piece itself. We'll explain how the process works in detail here.
- Dimensions:
Note that in the example above, the dimensions have reversed. The original piece was 2 rows by 3 columns, whereas the first rotated piece is 3 rows by 2 columns. Our number of rows and number of columns swap! - Piece:
The harder part of rotation lies in updating the piece itself. For each cell of the piece, this is done in two parts: finding the new row, and finding the new column. - Writing the rotateFallingPiece() function:
Now, to write rotateFallingPiece, we take the following steps. If you aren't sure how to implement any of these steps, re-read the explanation above!
- Store the relevant values associated with the old piece (its dimensions and the piece itself) into temporary local variables. We'll need these if we need to undo the action.
- Compute the number of new rows and new columns according to the old dimensions.
- Generate a new 2D list based on the new dimensions, and fill it with None values.
- Iterate through each of the cells in the original piece, and move each value to its new location in the new piece.
- Set fallingPiece and the other variables equal to their new values.
- Check whether the new piece is legal. If it isn't, restore the all of the values based on the temporary variables we created in Step 1.
- Finally, we modify onKeyPress to call rotateFallingPiece in response to an up-arrow key press. Now we're rotating!
- At this stage, we have piece rotation that is nearly perfect. However, there's one problem: when we rotate a piece that has many more columns than rows (or vice-versa), the rotation does not look very good. Consider the "I" piece:
- Why is this happening? Well, we aren't updating the piece's location! This means that we're rotating the piece with a fixed top-left coordinate, instead of rotating around the piece's center. To fix this, we'll need to update the piece's location as well.
- Location:
To compute where the new location is, we must calculate where the center of the old piece was, set it equal to the center of the new piece, and then work backwards to calculate the new piece's location. Observe that the center row of the falling piece can be computed as the sum of its top row plus half its height in rows. That is:centerRow = fallingPieceRow + numFallingPieceRows//2We actually have two pieces: the old falling piece (before the rotation), and the new falling piece (after the rotation). We can compute each of their centers as such:oldCenterRow = oldRow + oldNumRows//2 newCenterRow = newRow + newNumRows//2Note that oldNumRows and newNumRows are not the same, since the dimensions change when the piece is rotated. In any case, to keep the old and new centers the same, we just set oldCenterRow equal to newCenterRow in the equations above.oldRow + oldNumRows//2 = oldCenterRow = newCenterRow = newRow + newNumRows//2Then we solve for newRow in this new equation, which gives us:newRow = oldRow + oldNumRows//2 - newNumRows//2We then repeat for the column, and we're done! - Now that we've calculated the new fallingPieceRow and fallingPieceCol, we should set them (and reset them when the move is illegal) in rotateFallingPiece, the same way we set the number of rows/columns and the piece itself. Now we're really rotating!
- Hint: This is a great time to pause and test your game so far. Try pressing the up-arrow key to rotate the falling piece (and try to move it off the board!), and press some non-arrow keys to test out all the piece types. Verify that the piece rotates counterclockwise, that the center basically stays fixed, and in particular that a 360 degree turns result in no change to the falling piece.
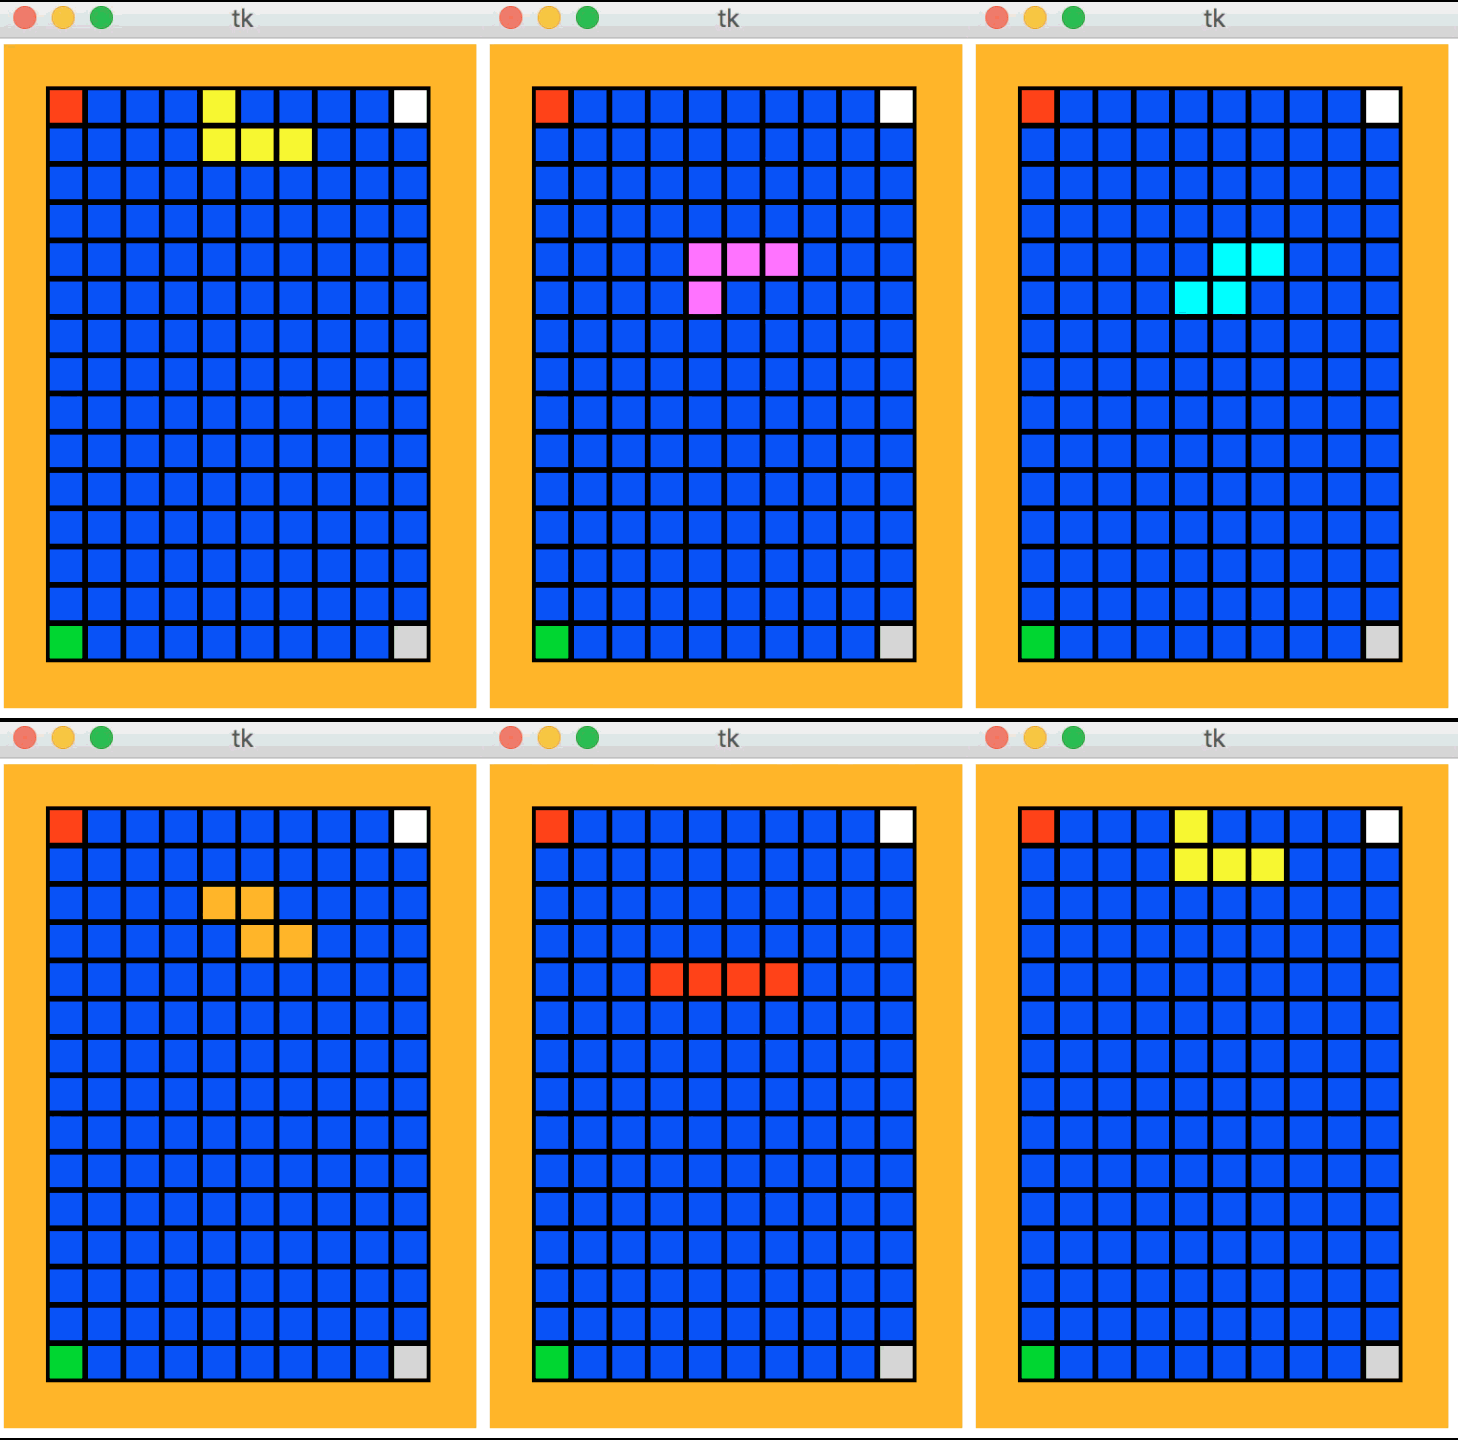
- At the end of this stage, your Tetris board should be able to do this:

New Column: Consider what happens as we move in the original piece from number 0 to number 3 (that is, moving downward with rows increasing from 0 to 1). This maps in the updated piece to moving across with columns increasing from 0 to 1. Thus, for each cell, our new column is equal to our old row.
New Row: Consider the other dimension, as we move in the original piece from number 0 to number 2 (that is, moving across with columns increasing from 0 to 2). This maps in the updated piece to moving up: the rows decrease from 2 to 0. Thus, for each cell, our new row is equal to (2 minus our old column). More generally, we replace "2" with "one less than the number of old columns".

|
David Kosbie |