
Although a sheet-full of fragments looks a lot like a file, it can do things that a file can't. For example, the same fragment can exist on multiple sheets, so that you can show several different organizations of the same code. Note that these are not just copies of other code, but exactly the same objects. When a fragment is edited on one sheet, the change is instantly reflected on all other sheets.
By internally representing programs this way, Sheets can provide features that other environments do not. In particular, Sheets provides very good navigation facilities. For example, with a single keystroke, you can find the definition of a method, or any place that calls it.
Alternatively, you can use the SunDial demo project:
sheets SunDial.sheets
The edit window has two panels:
Most fragments support at least three views:
A text selection works basically the same as the selection mechanism in any text editor. The selection is indicated by a mouse drag from one end of the selection to the other. However, in Sheets a text selection cannot extend across a fragment boundary. If you attempt to select more than one fragment by dragging, you will be baffled because the drag is interpreted as a fragment move from the start location to the end location.
A fragment selection selects one or more entire fragments. There is no way in Sheets to select the end of one fragment and the beginning of the next. The fragment that the cursor is in is always part of the selection, so you can select a single fragment by just left-clicking on it. This selection is indicated by the black line drawn around the current fragment.
You can select multiple fragments by using shift-left-click and control-left-click. shift-left-click selects all of the fragments between the current fragment and the mouse position. control-left-click adds a single fragment to the selection without deselecting any of the already selected fragments. If there is a multiple selection, all of the selected fragments have their background changed to yellow and are outlined by a red line box.
If there is a multiple selection in effect and you want to go back to the normal mode of having a single fragment, you can double-click on the fragment. (Double-clicking is a highly magical operation. When in doubt, give it a try.)
Note that this is not the same as selecting all of the fragments inside the sheet. If you cut and paste a sheet, you preserve the title and all of the other meta-information associated with the sheet.
When a sheet is selected, fragment operations such as Destroy will affect the sheet itself, and only implicitly affect the contents insofar as the affected sheet may be the only reference to those fragments. Some fragment operations such as Fragment/Cut are forbidden on the outermost sheet displayed in a window, but are still valid on all contained fragments including sub-sheets.
When you are done making changes, you commit the edit via the Commit Edit option on the right-click menu or the green Commit button which appears at the bottom of the edited component. This explicit commit step serves two purposes: it tells Sheets when to redo syntactic and semantic analysis, and it allows a change to easily be discarded. Instead of committing an edit, you can also abort it using the red Abort button or right-click Abort Edit. This discards any changes and places the fragment back as it was before editing began.
The pink color of an fragment being edited helps to to remind you that editing is incomplete. All fragments being edited also appear in the Fragment Edits window, which helps to keep track of multiple edits in progress. The ability to have several uncommitted edits makes it easy to back out of an exploratory modification which spans several fragments. (If you have too many uncommitted edits, you can use the Window/Commit Edits command in the Fragment Edits to commit them all at once.)
Note that changes to a fragment are not written to the database until you commit the edit, so any uncommitted edits will be lost on a system crash, power failure, etc. (If you really like living on the edge, you can turn off the auto-sync profile variable, which will write the database even less often, but will give you slightly crisper performance.)
A fragment must be syntactically correct before it can be commited. If there is a parse error, a pop-up error message is displayed and the fragment stays in edit mode.
Java fragments and documentation paragraph fragments can also be created by editing an existing Java fragment or documentation paragraph. You can simply type what you want, without worrying about explicitly creating a new fragment. If you are at the end of a complete fragment, Sheets may automatically commit it and create a new fragment to contain your new text. Otherwise, Sheets will wait until you commit, at which point the parser will detect that there is more than one fragment in the result, and create several new fragments. When one fragment is replaced with two (or more), this replacement is done in all sheets that contain the fragment -- the new fragment is added to all sheets containing the old one.
Another way to create fragments is by "extending" an existing fragment. This rather poorly named operation has nothing to do with extending in the object-oriented sense, but simply means to create a new fragment like the current fragment and place it immediately after this fragment. Extending can be done by Fragment/Extend Fragment or by right-click Extend Fragment. Unlike the automatic extension that you get in the previous case, this operation only affects the current sheet. (This can either be an advantage or a disadvantage depending on the situation.)
If you find yourself with a new empty fragment which you don't want, you can get rid of it by committing or aborting it, or (usually) by simply hitting the enter key.
public static void main (String args[])the class is typically displayed as part of the method name:
public static void Foo.main (String args[])A static initializer in the class Foo looks like:
    Foo.<init> {
    }
When you are entering a Java object, you can choose to explicitly specify
the class that it belongs to, or you can leave it out and leave Sheets
to figure out for you. You also have the option to turn off display of
the class name, via click-control-block show without/java class name.
Similarly, you can explicity specify the package along with the class for each individual fragment, and choose to explicitly display the package name with the fragment. (Typically, you won't need to worry about packages for Java fragments as long as you create new fragments by extending old ones.)
If you edit a Java or Paragraph fragment to contain no text and then commit it, the result is no fragments. This is the same as destroying the fragment.
If you remove the last reference to a fragment, then it is automatically destroyed. In this case, removing and destroying are equivalent.
Both of these are useful operations, so there are two separate commands: Fragment/Paste and Edit/Paste. By default, these are bound to ctrl-shift-V and ctrl-V.
The way that you get fragments into the clipboard is by using Fragment/Cut (ctrl-shift-X). If multiple fragments are selected, multiple fragments will be cut. Since there is often both a text and fragment selection, this command is distinct from Edit/Cut (ctrl-X). If the clipboard contains only text, then it can't be pasted as a fragment.
You can copy a fragment from one sheet to another by selecting the fragment and using Fragment/Copy (ctrl-shift-C.) When you paste the fragment on the new sheet, you will then have the same fragment on two different sheets. If instead, you want to make a new fragment with similar text in it, you can paste the fragment as text within an editable fragment.
Deficiencies in AWT prevent the implementation of drag and drop between separate windows. However, you can drag a fragment between sheets when the sheets are displayed as inline sub-sheets in the same window.
Global undo (Edit/Global Undo) backs up the state of the entire database, which will undo operations such as committing an edit, destroying a fragment or moving a fragment within a sheet. When you run the global undo command, it pops up a dialog that allows you to step forward and backward through the global undo history.
There are two text areas describing commands in the history. The bottom pane displays the command which will be undone if you click on the Undo button. The top pane displays the command which you just undid (if any), and which will be redone if you click the Redo button.
When you've undone all the stuff that you want to undo, click Done in the global undo dialog. This closes the window and removes the commands that you have undone from the undo history; they can then no longer be redone. Normal sheets browsing can be done while the global undo dialog is active, but any command that modifies anything will close the dialog as though you had clicked Done.
NOTE: The global undo facility is still somewhat experimental. We believe that it is stable enough to do its job without corrupting your data, but it will quite possibly wreak havok on your on-screen displays. In this case, your best bet is to simply close and then re-open the affected windows.
Sheets only knows about code that is in the database. If you want Sheets to know about third party libraries, or even standard Java libraries, then you must make sure that these libraries or their summaries are loaded into your Sheets database.
Once you have specified what you're looking for, you press one of the buttons on the right of the dialog. This tells Sheets to find what you're looking for, and also what to do with the results. The buttons require some explanation:
To tell which methods are applicable, Sheets needs to be able to determine the type of Java expressions. Sheets provides contextual information even on code which is potentially incorrect due to edits in progress. It employs heuristics which usually make a good guess about the meaning of your code, but can make no guarantees when it is dealing with code which is incomplete or syntactically incorrect.
However, usually when Sheets doesn't find a definition, it is the code that is wrong. The method may be private or in the wrong package or not exported or an instance method being called from a static method, etc. Try doing a general query for definitions of the name to see what the definition really is.
The context window is itself a sheet, albeit a somewhat unusual one. You can select items in it, change the default view, even edit fragments in the context window. Also, you can double-click upon it to show the entire fragment in its original context. (This is a shortcut for the show-context-sheet command.)
The context help display acts somewhat differently when you are sitting inside the argument list of a function. In this case, it considers only the class of the instance whose method is being invoked, and not the classes of any arguments that may be in the call. This ensures that you see all of the useful options when you are in the process of changing the argument list.
For efficiency purposes, the Sheets waits for a short time before updating the window. If you issue several commands in quick succession (e.g. by holding down the BACKSPACE key) the context window will only update after the last command. The delay defaults to 100 msec, but can be modified via the context-help-delay profile variable.
The affected-by sheet is a special temporary sheet displayed in a TOC-only panel. When visible, it is found in the lower right corner of the screen. Each time an incompatible change is made, a new subsheets is created containing all of the affected fragments. The subsheet is given a description computed from the changed signatures.
Since the affected-by sheet is a sheet, all of the normal navigation capabilities are available. Usually what you do is find the change you are interested in the affected-by sheet, then double-click on that line. This will open the subsheet in its own full-size window where you can examine the code in detail.
The Search and Replace option in the Search menu provides traditional string-based search and replace. This command will search only the current sheet.
The main indication that this is a subsheet and not a text paragraph is that there is a plus sign (+) at the left of the fragment in both the TOC and the edit panel. If you click on the +, the contents are displayed, and the + changes to a -:

Clicking on the - hides the contents once more.
If you want to open the subsheet in a new top-level window displaying only that sheet, double-click on the TOC entry for the sheet. Double-clicking in the edit panel is another way to expand the sheet inline.
If there are highly nested sheets, you may want to recursively expand all subsheets of the current sheet. This can be done using Container/Recursively Open Containers (or right-click Recursively Open Containers from any container).
Cut and paste can be used to insert an existing sheet as a subsheet of another. One way to do this is Container/Copy Top Level Container then Fragment/Paste at the desired location. See also selection. A temporary sheet can be made permanent by inserting it as a subsheet of a permanent sheet.

The title of a sheet is a short name for the sheet which is displayed in the TOC. The description of a sheet is displayed in the gray area at the head of the sheet, and may be as much as a paragraph or so of text. You can leave the description blank in the properties dialog, then edit the description once the sheet has been created.
The most important setting in the properties dialog is the Kind button:

Attributes are displayed at the end of the fragment that they belong to. Each displayed attribute is marked by an red-outlined icon in the left margin. Its value is indented to help set it off from the surrounding fragments.
More then one attribute can be displayed at once. If you display the documentation attribute on the SunDial class, you will see this:

There are two kinds of attributes: string and list. documentation is a list attribute. It contains fragments, and its value can be manipulated very much like a sheet. package is a string attribute; its value is a plain string, in this case, the name of the package that the SunDial class is defined in. List attributes are a form of typed hyperlink, whereas string attributes are a simple property of the fragment.
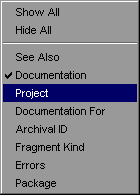
On this menu each displayed attribute is has a checkmark displayed. If a displayed attribute is selected, it will be hidden. Show All shows all of the possible attributes, and Hide All will hide all displayed attributes.
Each displayed attribute has an icon, such as the book for documentation. If nobody has bothered to come up with a clever icon, a red X will be displayed, as for package. Clicking the icon for any displayed attribute will hide it. Furthermore if the attribute value is "interesting", then the attribute icon will always be displayed even if the attribute is hidden. In this case, you can display the attribute by clicking its icon. (Typically an attribute is considered interesting if it is a non-empty list. However, other attributes such as errors may be defined as interesting.)

As with a text fragment, you must commit the edit when you are done. Each attribute is edited and commited indepdently from other attributes and from the parent fragment.
Occasionally, when you edit a fragment from within a constrained sheet, you will end up changing it in such a way that it no longer belongs on that sheet. Rather than magically removing the fragment as soon as it is committed, Sheets lets you choose how to handle the situation. You always have the option to either cancel the commit operation and keep editing or to commit anyway and let the fragment disappear. Sometimes you are also given the option of permanently removing the constraint from the sheet. If you choose this option, the sheet will go back to behaving normally, without doing any magic updates.
If you try to add a fragment to a constrained sheet which doesn't belong there, or to remove a fragment that does belong there, Sheets will simply beep at you without taking any action.
Several list-valued attributes also have constraints. For example, the exports attribute for a Java class fragment must contain all of the fields, methods, and constructors for that class. It is not allowed to contain fields, methods and constructors for other classes, nor any non-Java fragments. (Note that this leaves a middle ground -- comments are permitted but not required by the constraint.) Constraints on attributes cannot be deleted.
Some attributes have a special bi-directional constraint. Each fragment in a bi-directional attribute is connected back to the containing fragment via a corresponding attribute. For example, if fragment foo is contained in the documentation attribute of bar, then bar is contained in the documentation-for attribute of foo. Other bi-directional pairs include file-headers/file-header-for and see-also/see-also. Note that the connection goes both ways -- you can add documentation for a fragment by simply adding it to the documentation-for attribute of the doc fragment.
The database is only brought up to date at specific sync points, see sync-database. If Sheets never reaches a sync point due to a crash, then there will be dbname.sdb.log and dbname.sdb.lock files in addition to the .sdb file. You must delete the lock file (but not the log file) before sheets will let you resume using that database. Normally the lock file provides a way for Sheets to protect against the possibility that you might have an existing Sheets process using that same database.
You can have many database files, however we suggest that you only modify any given project in one particular database. Otherwise, you risk getting confused about which version is current. Also, Sheets may assign the same object ID to different objects in the different databases.
When you create a new database, it will be initialized with the contents of prototype.sdb from the sheets home directory. This allows you to, for example, always include summaries of the standard Java libraries in any database you create, by simply executing
sheets -exit prototype.sdb Java.sheets
from the sheets home directory.
In general the project of each fragment is specified by its project attribute. However with Java fragments, the project is specified once per package. The only Java fragments that it is possible to set the project of is a package header, or members of the magic default package (<default>). When you set the project of a normal package, the project of all fragments in that package changes too. However, since it is impossible to create a declaration for the <default> package, you must instead explicitly specify the project for each fragment in this package. (Note that this is a useful feature, not a limitation. It keeps anyone from trying to assert "ownership" of your small demo programs.)
With documentation fragments and sheets, the project is settable, and you must take some care to set it correctly.
The command Container/Change Project Of Everything Reachable is very useful for splitting an existing project into multiple projects or for fixing a sheet hierarchy where some of the fragments are in the wrong project.

After you give the project name, choose one of these options to say what should be in the new project:

If code is exportable then Sheets will write out the latest version of the code before running the compiler. Normally you want to import Full source. The Summary Only option is used for creating summaries of Java libraries which you use but don't compile.
Unfortunately, this dialog doesn't allow you to specify the project, so unless brought up via the new-project wizard, it will simply inherit the project of whatever fragment is selected, and will be inserted immediately after the selected fragment. If you wish to create a new project with the imported code, you should probably use the new-project wizard instead.
The dump file format was specifically designed for use with version control systems, such as CVS. Not only can you check a dump file into CVS, other operations, like diff and merge, will also work. Though we've been doing it, can't really recommend using standard version control tools with sheets. There is an all-sheets version control solution in the works.
At any time you can save all loaded projects to their corresponding dump files with the File/Save Dump File... command. This brings up a dialog showing all of the loaded projects and the dump files that they will be saved do. You can change the file to be in a different directory, but the name of the dump file must be the project name. When you click OK, the dump file is rewritten to contain all of the fragments currently in the project.
You should periodically save out dump files and then back them up somewhere. This allows you to recover if there is a disk crash or if a Sheets bug somehow corrupts the database.
When working with multiple developers, it is frequently necessary to merge your work with others. Many version control systems provide some merge tool to do this semi-automatically; when the merge tool can't figure out how to merge properly, it will create merge conflict annotations in the result. If there are merge conflicts, you'll have to edit the dump file by hand to fix them Be careful not to insert empty lines in the middle of a fragment in the dump file. All fragment text (including apparently empty lines) should have a single leading space.
These projects are called summaries because they doesn't contain the actual code for all the stuff in Java -- they only contain the headers that are needed for context help. This saves memory and load time. You can create summary projects for any library for which you have source code. Simply use the "new project wizard" to import the source directories while specifying "Summary Only" and turning off the "Make exportable" checkbox.
Exporting is the process of taking Sheets hypercode, and turning it into files suitable for compilation by external file tools (such as Java compilers or documentation processors). Files can be exported by File/Export/All Fragments or File/Export/Dirty Fragments. It shouldn't be necessary to export all fragments, but it may help if something isn't being exported that should be. Exporting all code will also force a complete recompilation.
Export Dirty Fragments exports Java classes and documentation that have somehow changed since the last export. This not only includes classes whose members have changed, but classes that might have been affected by some incompatible interface change. Thus, it generally touches all of the files that need to be recompiled. Note that Files/Compile implicitly exports dirty fragments.
There is a potential problem inherent in the "free form" class organization described above. Although Sheets can determine all of the members in a class regardless of where they live, it doesn't necessarily know what order to write them in or whether any given comment belongs with the class. Therefore, all of the code which should be exported with a class are collected in the exports attribute of that class. The attribute is constrained so that it can only contain members of the class or comments. The constraint also guarantees that all of the members will be included. You cannot delete class members from this attribute, although you can of course destroy them.
When you import a file into Sheets, the exports attribute will be initialized with all of the class contents, including comments, in the exact order that they occurred in the file. This helps ensure that if you later look at the file with some tool other than Sheets, you will see roughly what you had before. Depending upon how you create new members, they may not appear where you expect. You can, however, open the attribute and reorder the members however you wish. Similarly, you can guarantee that comments will appear where you want them by explicitly adding or moving them in the exports attribute. (Note that if you create new Java components by typing at the end of old ones, things will generally end up where you expect them. If you create brand new components or use the explicit extend command, members will more likely be tacked on to the end. This behavior may be changed in future versions of Sheets.)
You can also use attributes to control the exact form of the file header for a class file. The file-headers attribute can contain either arbitrary Java file header fragments (i.e. lists of import clauses with an optional package clause at the top) or Java comments. These will be written out more or less verbatim, except that Sheets makes sure that the package name comes before any imports clauses.
If you don't have any file-headers specified, Sheets will try to find a Java file header with a package clause for the class's package and will use that as the file header. However, for the <default> package, you will have to explicitly specify any headers.
When you import a file into Sheets and then re-export it, there will be some unavoidable minor changes. The changes are as follows:

This dialog gives you the option of compiling files which have changed since the last invocation or recompiling your program's entire set of files. When you select either compile or recompile, Sheets will export all dirty fragments and invoke the compiler.
If compiling your program produces errors, Sheets will create a new sheet of all fragments that had errors in them. Each line that had an error is flagged by a red arrow in the left margin. At actual error message text is displayed in the Errors attribute at the bottom of the fragment. Since the error sheet is a sheet, you can edit the fragments right there in the error listing. If you want to see the fragment in context, use right-click Show In Context.
The default keybindings include use of the F5 key as the keyboard shortcut for compile-program, while control-F5 is the shortcut for recompile-program.
Any changes to the compilation commands that you make using the dialog will only last as long as your current Sheets session. Usually you will set the default values for these commands in your .sheetsrc using the compile-command or recompile-command variables. (If you are running under a non-Windows platform, the program in the compilation commands must be specified as an absolute pathname; this is a limitation of Java. If you are running under Windows, Sheets will filter your command through a special program named "wrapper" which will (amongst other things) look things up in your PATH environment.)
If you are building a small java-only program, you can probably simply use the default compile command: "javac %java%". The string %java% is a substitution variable which is replaced with a list of all ".java" files which need to be recompiled. (This list will contain both classes which have been changed within sheets and classes which have been affected by interface changes.) The default recompile command is "javac %JAVA%". The new substitution variable refers to all Java files managed by Sheets. Note that there are other similar substitution variables: %class% and %CLASS% refer to the ".class" files for Java classes. For exported XML (DocSheet) fragments, you can use %xml%, %XML%, %html%, %HTML%.
Typical .sheetsrc configuration of compilations commands to run make under windows would look something like this:
  set compile-command "nmake "
  set recompile-command "nmake recompile"
(If you are on a non-Windows machine you should remember to specify an absolute pathname for your "make" utility.) When you export files, Sheets will create a file named export-map.mak, which is useful for including in makefiles. It defines two makefile variables, EXPORTED_SRCS and EXPORTED_OBJS. EXPORTED_SRCS is all filenames that were exported since Sheets was started. EXPORTED_OBJS is the name of the object files that correspond to the source files exported. For example, if you exported Foo.java and Bar.java, then export-map.mak would look like
    EXPORTED_SRCS = Foo.java Bar.java
    EXPORTED_OBJS = Foo.class Bar.class
The Makefile for building Sheets makes use of this facility. It does something like this:
    !if EXIST(export-map.mak)
    !message Using export map
    !include export-map.mak
    !else
    !message No export map available
    EXPORTED_SRCS =
    EXPORTED_OBJS =
    !endif

    compile : $(EXPORTED_OBJS)

    # How to turn .java files into .class files
    .SUFFIXES : .java .class
    .java.class :
            $(JAVAC) -nowarn $*.java
(Note that this example will work only under Microsoft nmake, because it uses the nmake preprocessor and nmake inference rules to turn .java files into .class files.) This example assumes that all editing is done inside Sheets, and that before Sheets is launched, all .class files have been compiled. For a slightly more robust version, see the real Makefile distributed with the Sheets source code.
In a .sheetsrc file, any line that begins with a pound sign (#) is considered a comment. .sheetsrc files are case sensitive. Mainly what you do in .sheetsrc is bind commands to keys and set variables. Sheets variables are used both for system configuration such as file locations and for user preferences. For more information, check the reference manuals for commands and variables.
The distribution contains several "typical" .sheetsrc files. default.sheetsrc is a nice neutral starting point, while nkramer.sheetsrc and rgs.sheetsrc represent the more idiosyncratic preferences of several Sheets developers. The former follows a minimalist Win32 style, while the latter reflects more of an Emacs flavor.