Let me just start off to say that I must be stupid. I can't believe the professor can complete this project in 8 hours while it took me probably the full
two weeks!!! In any case, I've done almost all the bells and whistles offered for this project, and I've added some other creative stuff.
Image Warping and Mosaicing:
For the basic image warping, only four correspondence points were declared, mostly to define things to warp into squares or rectangles. To speed up the process and save memory,
I sometimes crop the image so that only the important information is fed into Matlab to get warped. In Image Mosaicing, even though SSD was used to try to optimize the selected correspondence points, it doesn't always yield good results. In fact, a lot of the stitching performed had the SSD optimization turned off.
The approach used was to stitch each image one by one onto the central image. The blending used to combine the images was center weighted alpha blending.
As for the bells and whistles, the fake graffiti and signs were created with just a simple homography
warp using four correspondence points, while no blending was necessary. I produced the movie on a building by warping image by image and then recompile the images into a video. In the bizarre mosaic, I simply cut out the different parts from the input images and warped them together.
The laplacian blending was really tricky in that the multiscale version was a multiscale and multi-level laplacian pyramid. Here are the steps I used to create the multiscale Laplacian blending:
Create laplacian pyramids of the two images
Find the centerline of where the two images will overlap
Blend the low frequency images of the lowest level of the pyramid (the blurriest level) with feathering at the centerline
Add the high frequency of the images of the lowest level with simple cut and paste
Add the combined low frequency and high frequency images compiled from the previous steps
Blend the low frequency images of the next level of the pyramid
Average the two images computed from step 5 and step 6
Repeat...
Cylindrical mapping was quite easy to do, except the fact that when I first tested my program using a radius of 1 and focal length of 40, I kept thinking there was a bug in
my program. In the end, I calibrated the focal length to my camera and used a radius of around 1000. The 360 degree panorama gave me the most headache. When I used the calibrated
focal length, my images did not stitch together with simple translation. In the end, I wrote a program to help me guess my focal length, which turned out to me near 986 rather than
895.
Feature Matching for Autostitching
The basic automatic matching was performed according to the paper “Multi-Image Matching using Multi-Scale Oriented Patches” by Brown et al., with the exception of using multiscale oriented feature descriptors, which I did implement in the bells and whistles section.
I also did not do the sub-pixel accuracy part of the paper, since all my results look good without that accuracy. A minor detail to my stitching of the images is that instead of using the
homography estimated by RANSAC, I recalculated the homography with only the inliers before I stitched the images together. In the panorama recognition, I could have set a limit as to how many
matching points are required before the program will stitch the images together. Instead, I just used an easy way, which was to stitch the images with the maximum number of matching inliers.
Extras
The comparison of the stitching and blending methods was pretty straight forward. The only challenge was really to find an image that clearly did not stitch well together in the conventional way. In my attempt to splice two movie
clips together, the results look terrible. It was really difficult to find two scenes that look similar to begin with, let alone two scenes with the same camera movement. To compose the result however, I warped the Dare Devil clip image by image
before constructing it into the Batman clip.
Image Warping and Mosaicing:
Basic Image Warping:
This is The Madonna of Canon van der Paele by Jan van Eyck that I downloaded from the internet. I simply selected the pattern in the middle of the carpet to be a square.
Original Picture
Input Picture
Cropped Picture
As-warped Picture
This picture is the inside of the Statue of Liberty. The new image is supposed to be as though we looked at the left side of the structure in the image.
Original Picture
Input Picture
Cropped Picture
As-warped Picture
My friend took this picture in Europe. I simply made it look as though I took a picture of the road sign instead.
Input Picture
Cropped Picture
As-warped Picture
I took this picture in New York. The original image was actually a little blurry, but the image still warped nicely.
Input Picture
Cropped Picture
As-warped Picture
Basic Image Mosaicing:
This set of images was taken at the Waterfront. The images align really nicely with selecting some correspondence points with the car, and some with the background buildings.
Input Picture #1
Input Picture #2
Input Picture #3
Stitched Image
This set of images was taken at the top of the incline. The images stitch very well together, except that the things really far away are a little blurry. When these pictures were taken, it was really windy...as can be seen with the
tree close to the front, so perhaps in addition to rotation, some slight translation took place when the pictures were taken.
Input Picture #1
Input Picture #2
Input Picture #3
Stitched Image
The mouse family images were taken a long time ago in Vancouver. If the enlarged version of the picture is observed, input picture #2 is actually a little blurry, which probably was the reason why the images didn't stitch well together. Also, there was actually a glass pane in front of the display, and obvious glare from the glass pane can be seen in the input images.
Input Picture #1
Input Picture #2
Input Picture #3
Stitched Image
Bells and Whistles:
Blending and compositing
Fake graffiti
I got the graffiti image from the internet and then used the Brush Stroke filter in Photoshop to make this image look more
graffiti-esque.
Input Picture #1
Input Picture #2
Fake Graffiti
Once again, I took another image I have of myself, and used the Brush Stroke filter in Photoshop and adjusted the levels and contrast
to make the image look more as though it was drawn onto the building.
Input Picture #1
Input Picture #2
Fake Graffiti
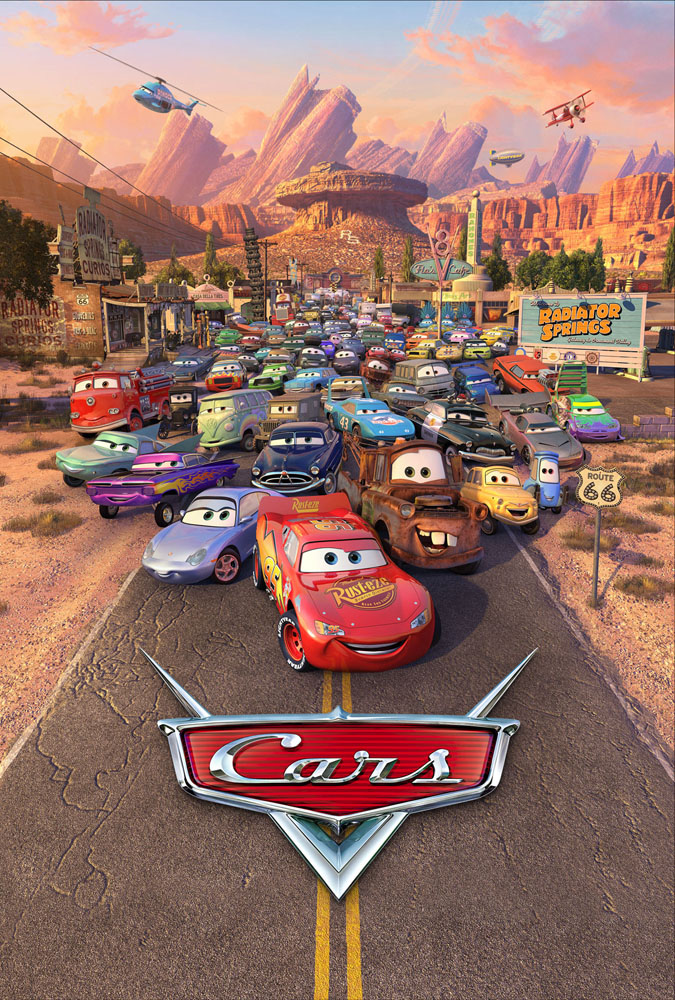
Fake signs
Here I was just having some fun. Being a fan of Pixar, I love both Ratatouille and Cars.
Input Picture #1
Input Picture #2
Fake Sign
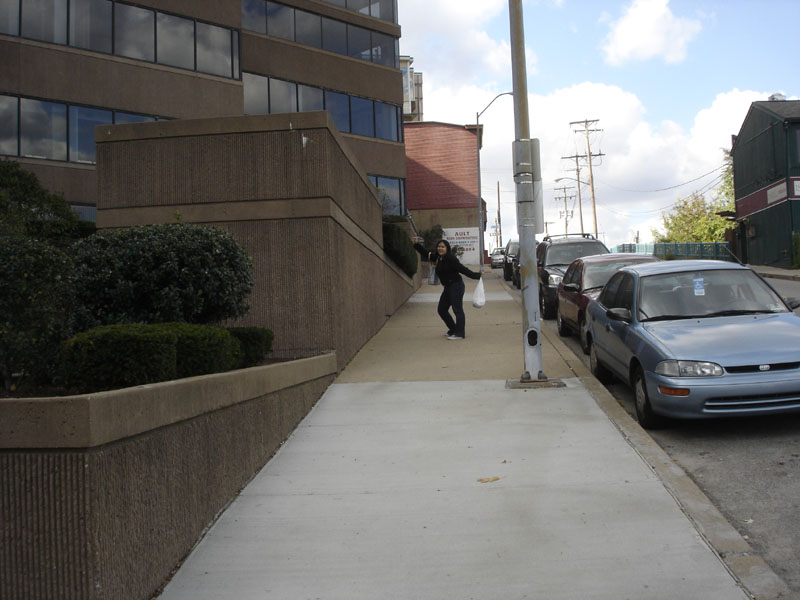
Here I decided to put multiple copies of my embarassing eating face into Times Square. Surprisingly the images
work quite well, probably because the lighting of both input pictures were kind of similar.
Input Picture #1
Input Picture #2
Fake Sign
I just decided to mess around with a picture my friend took of me and Begum at the Halloween party.
Input Picture #1
Input Picture #2
Fake Sign
Movie on a building
This clip was obtained from the Halloween party too. Kind of interesting to see Steve crack his
whip while being on the side of a building! Here I simply captured the video into images, warped them
onto the building picture, then reconstructed all the images into a video. Click on the "Movie on the Wall"
picture to see the video!
Input Picture #1
Input Picture #2
Movie on the Wall
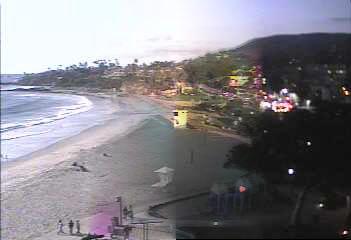
Time mosaics
I got these images from Earthcam.com where they have a webcam overlooking Laguna Beach in California. I simply went into
the "Hall of Fame" section and found pictures of different times of the same spot. Here I cropped the images so that the overlap sections are only about a quarter of the image.
Input Picture #1
Input Picture #2
Input Picture #3
Time Mosaic
I got these images from Westland.net where they have a webcam overlooking the Santa Monica Pier in California. For these images, I had to remember
to visit the website at different times of the day to capture them. As can be seen, the early morning picture of picture #1 and the afternoon picture of picture #2 may have been too similar
to see much change.
Input Picture #1
Input Picture #2
Input Picture #3
Time Mosaic
Bizarre mosaics
I took these pictures near the incline. The camera was on a tripod, and as I moved around, my friend captured the images. The
unfortunate thing I found with using the computer to generate the bizarre mosaic was that I can't overlap myself. I had to cut out pieces of the images
and warp them together, and making sure in the meantime that I won't cover up the other version of me. So, I included a photoshop version of a
bizarre mosaic. To be honest, Photoshop is pretty amazing.
Input Picture #1
Input Picture #2
Input Picture #3
Input Picture #3
Bizarre Image
Photoshop Image
Laplacian Blending
These images are pictures of the microstructure of a Nickel superalloy that I obtained from my friend Chris.
To be honest, it was kind of challenging to find images that have a big lighting change between the panoramic pictures. Since
these images were taken with a microscope camera, I don't think he was able to set the aperture and exposure settings.
Comparing the two-level with the multiscale laplacian blending, I think the two-level looked better. Perhaps I didn't use a big
enough Gaussian blur, since the multiscale blended image looks like the sharp stuff got softened down.
I used nine calibration images shown below and the Camera Calibration Toolbox for Matlab provided by Jean-Yves Bouguet to calibrate
the focal length of my camera. The focal length of my camera turns out to be [ 894.65816 894.46619 ] ± [ 2.89797 2.77396 ] pixels.
The input panoramic picture was actually stitched together with the automatic stitching program. I simply
took this image, and fed it into my cylindrical and spherical mapping programs. Here I used inverse cylindrical and spherical mapping to
produce the output images. Because the input image looks like it already has a "bend" to it, the output cylindrical and spherical images look
too similar. Therefore, to make it more obvious that there is a difference, I reduced the focal length to 1500 pixels for the spherical
projection.
Input Picture
Cylindrical Projection
Spherical Projection
360 degree cylindrical panorama
This is the part of the project that made me want to jump out the window. When I used the calibrated focal length, the images don't stitch together! Perhaps
I didn't use enough images to do the calibration, or because there was a bigger error than they estimated in the program. In any case, I used a focal length of 986 pixels
in the end, and the images were stitched together in Photoshop, since I didn't want to deal with Matlab's OUT OF MEMORY problem.
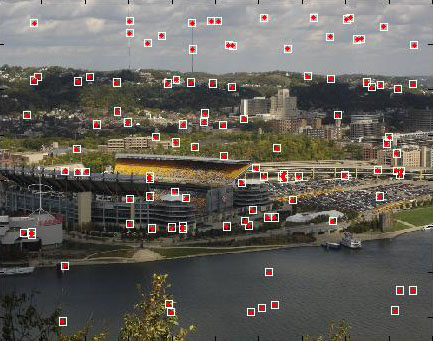
Feature Matching for Autostitching:
Basic Automatic Matching:
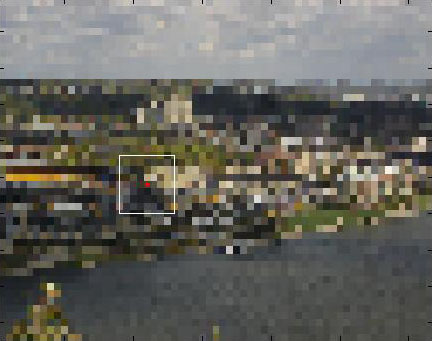
The images below show the point selection process. The red points are from harris corner detection, the blue are the remaining points
after performing feature matching, and finally the yellow points are from RANSAC.
Picture #1
Picture #2
Here are just some panoramic pictures stitched together with this automatic method.
Bells and Whistles
Multiscale harris corners and feature descriptors
To produce multiscale harris corners, the pictures were simply blurred and down sampled before performing
the harris corner detection. The white boxes simply imitate the pictures shown in the paper. It should
be noted that at all the different Guassian pyramid levels, the features were taken from a 40x40 window before
down sampled to a 8x8 feature descriptor.
Picture #1
Picture #2
Rotation invariance to feature descriptors
The orientation of each interest point was calculated using the equation given in the paper. The
feature descriptors were extracted by applying a rotation matrix on the 40x40 window, and then taking the
pixels that would fall into the rotated window as the feature descriptor window. Once again, the 40x40
window is then down sampled into the 8x8 feature descriptors before matching was performed.
Picture #1
Picture #2
Panorama recognition
Here I input 3 images into my program, and the program will stitch the pair of images that have the maximum
number of inliers from RANSAC.
Input Picture #1
Input Picture #2
Input Picture #3
Stitched Image
Extras:
Comparison of blending and point selection method:
From first comparing all the images, it may appear as though automatic stitching with center weighted alpha blending and two-level Laplacian blending
both give equally good results. However, from the cropped images, it can clearly be seen that automatic stitching with two-level Laplacian blending is the
best of all the other methods.
Center-weighted Alpha Blending
Two-level Laplacian
Multiscale multilevel Laplacian Pyramid
Manual Point Selection
Automatic Point Selection
Center-weighted Alpha Blending
Two-level Laplacian
Multiscale multilevel Laplacian Pyramid
Manual Point Selection
Automatic Point Selection
Splicing two movies together:
At first, I thought splicing two movies together would be really interesting, since people from previous years always simply plop a
video clip onto a TV screen of another video clip. However, the results looks pretty bad. The difference in camera movement made it look just
like two different clips placed side by side rather than Batman actually looking at Dare Devil jumping around. Also, the two scenes are SO DARK!
When I was trying to figure out where things go, I had to turn all the lights off to try to see anything. Nevertheless, here's the clip.